…


Yes, it has been a difficult year, with most events cancelled. I have to say, as a former Safety Officer, in many cases, unneccesarily (the Covid-19 Secure Guidelines have permitted outdoor events – that have been Risk Assessed and follow Social Distancing – thoughout much of the year, but many organisations have chosen to cancel, anyway … in some cases, I think, because that’s what everyone else was doing) …
That said, we have managed some closed events, some bespoke tours, a training weekend for the Troop (which replaced our 375 spectacular in the calendar) and finally, on October the 25th, an open battlefield tour.
We have been working with landowners to open up more of the battlefield this year, particularly, thanks to Alan Larsen and The Troop, on the flanks, where the cavalry fought.
Scenes from the training weekend (which included some set-up filming segments) …
The marshalling areas (above) and some set piece filming (below)


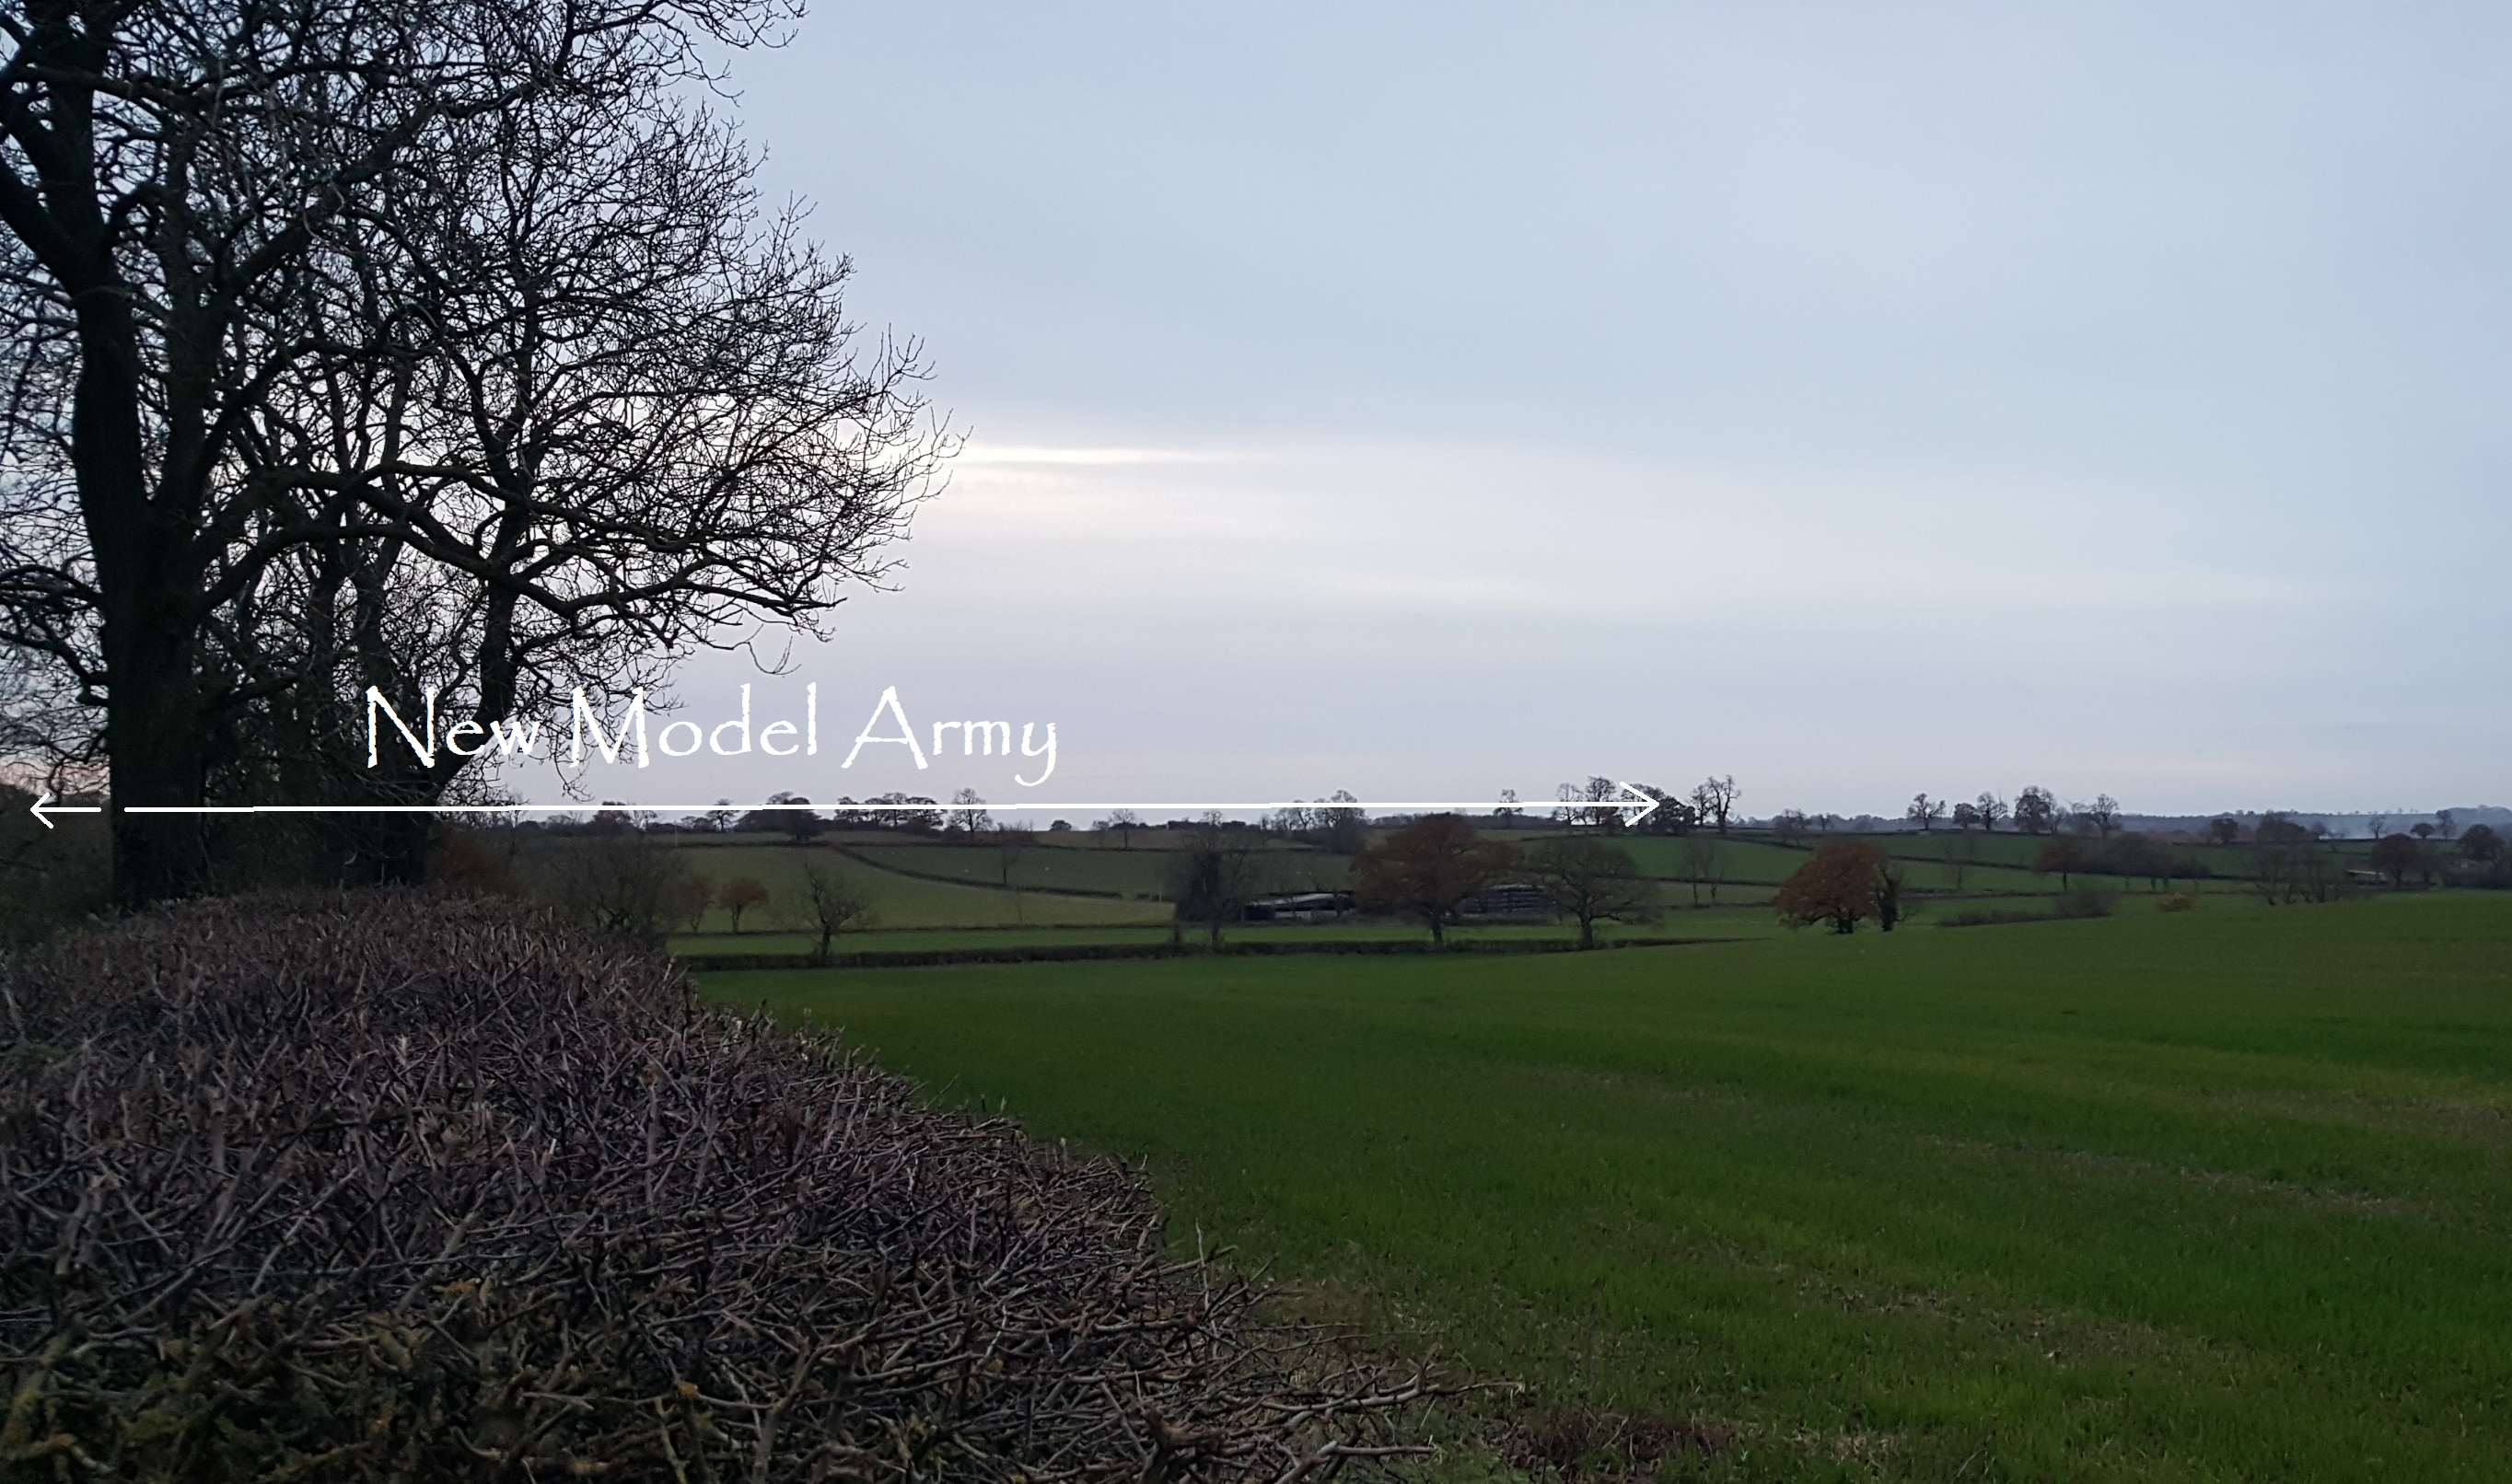
The cavalry flanks … I added a couple of open landscape shots to the Galleries …
The Royalist right flank (Prince Maurice)


(shot finds map associated with these fields on the Royalist right: this is primarily the firefight with Col Okey’s dragoons who were stationed in the parish boundary hedge)
The Royalist left flank (Langdale) viewed from Paliament’s Right (Cromwell)
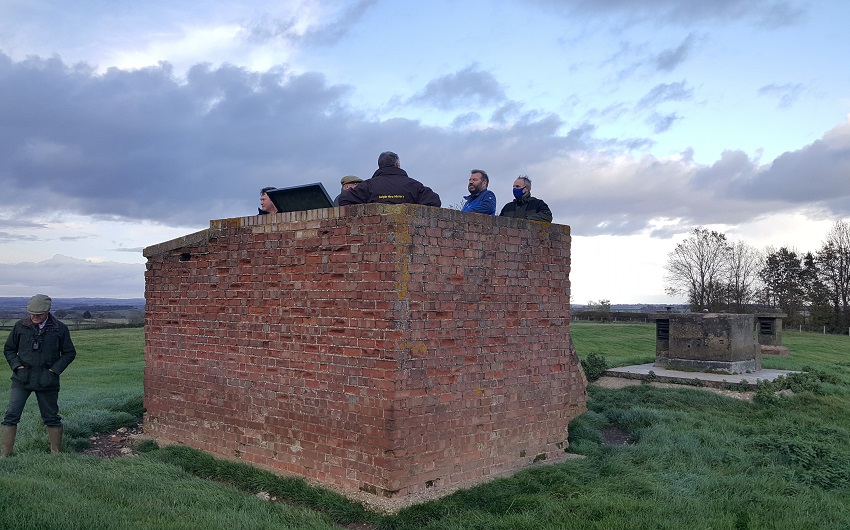
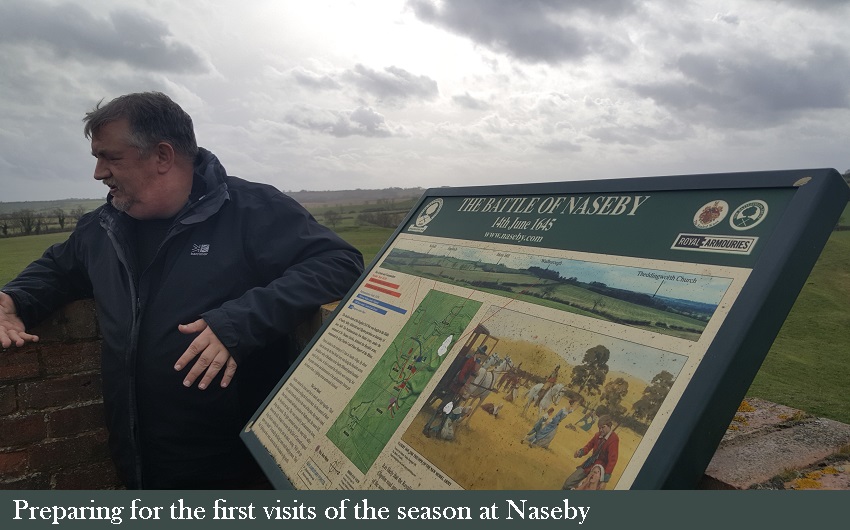
The October public tour …
The tour was limited to 15 (to allow adequate distancing) booked in advance (to ensure we had traceable contact details) – and sold out very quickly. Everyone showed up as booked.
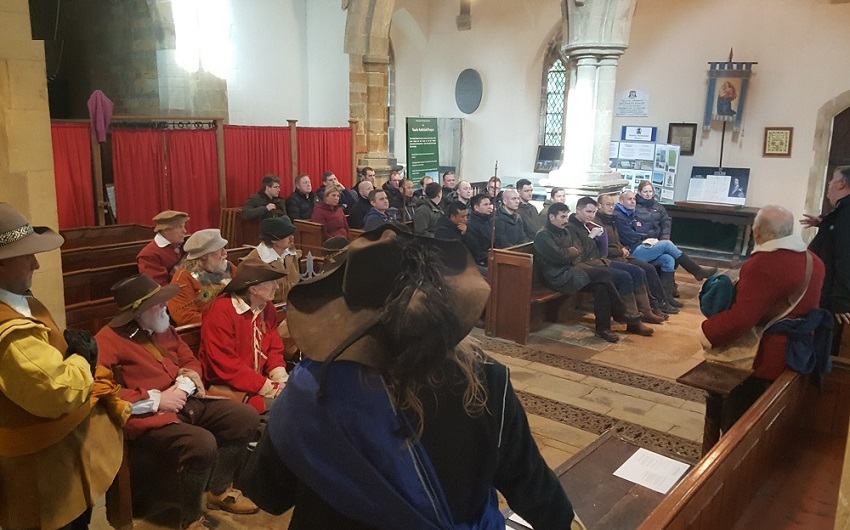
We started the tour with background stories and orientation in Naseby Church. I’ll include a picture for posterity (as I think the masks will characterise this period for years to come) …
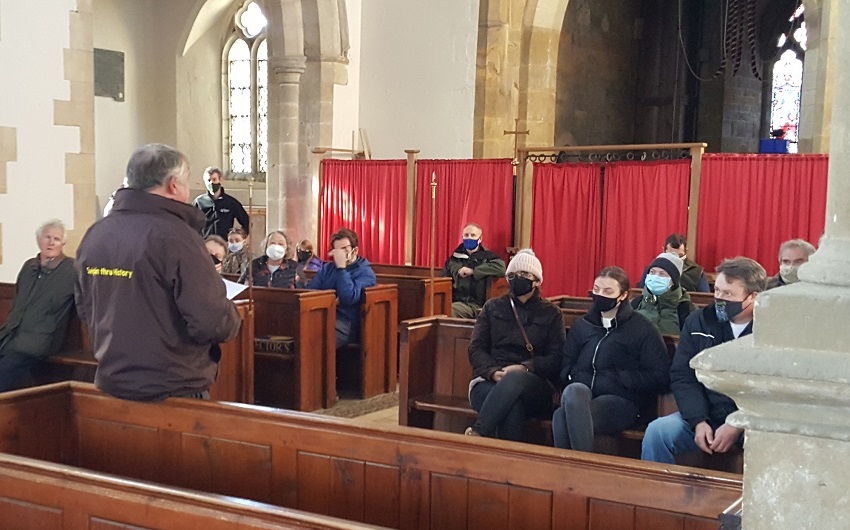
Most of the visitors were in household ‘bubble’ groups, which were OK sitting together …
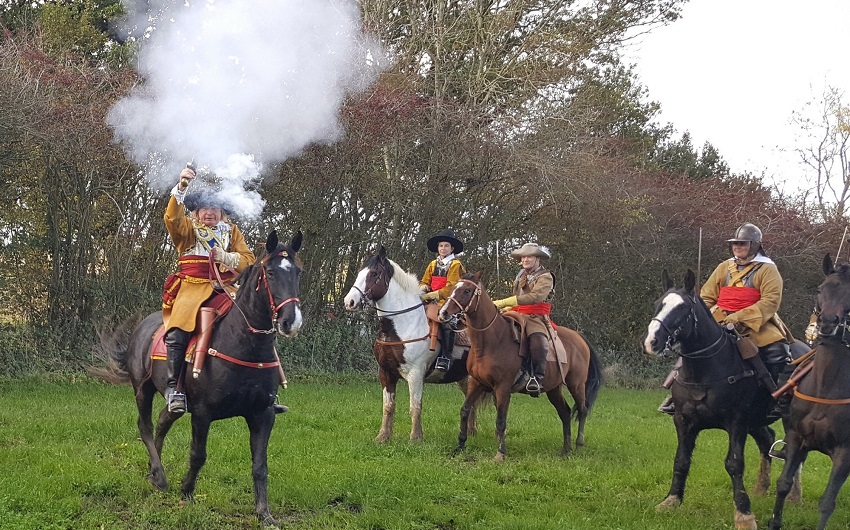
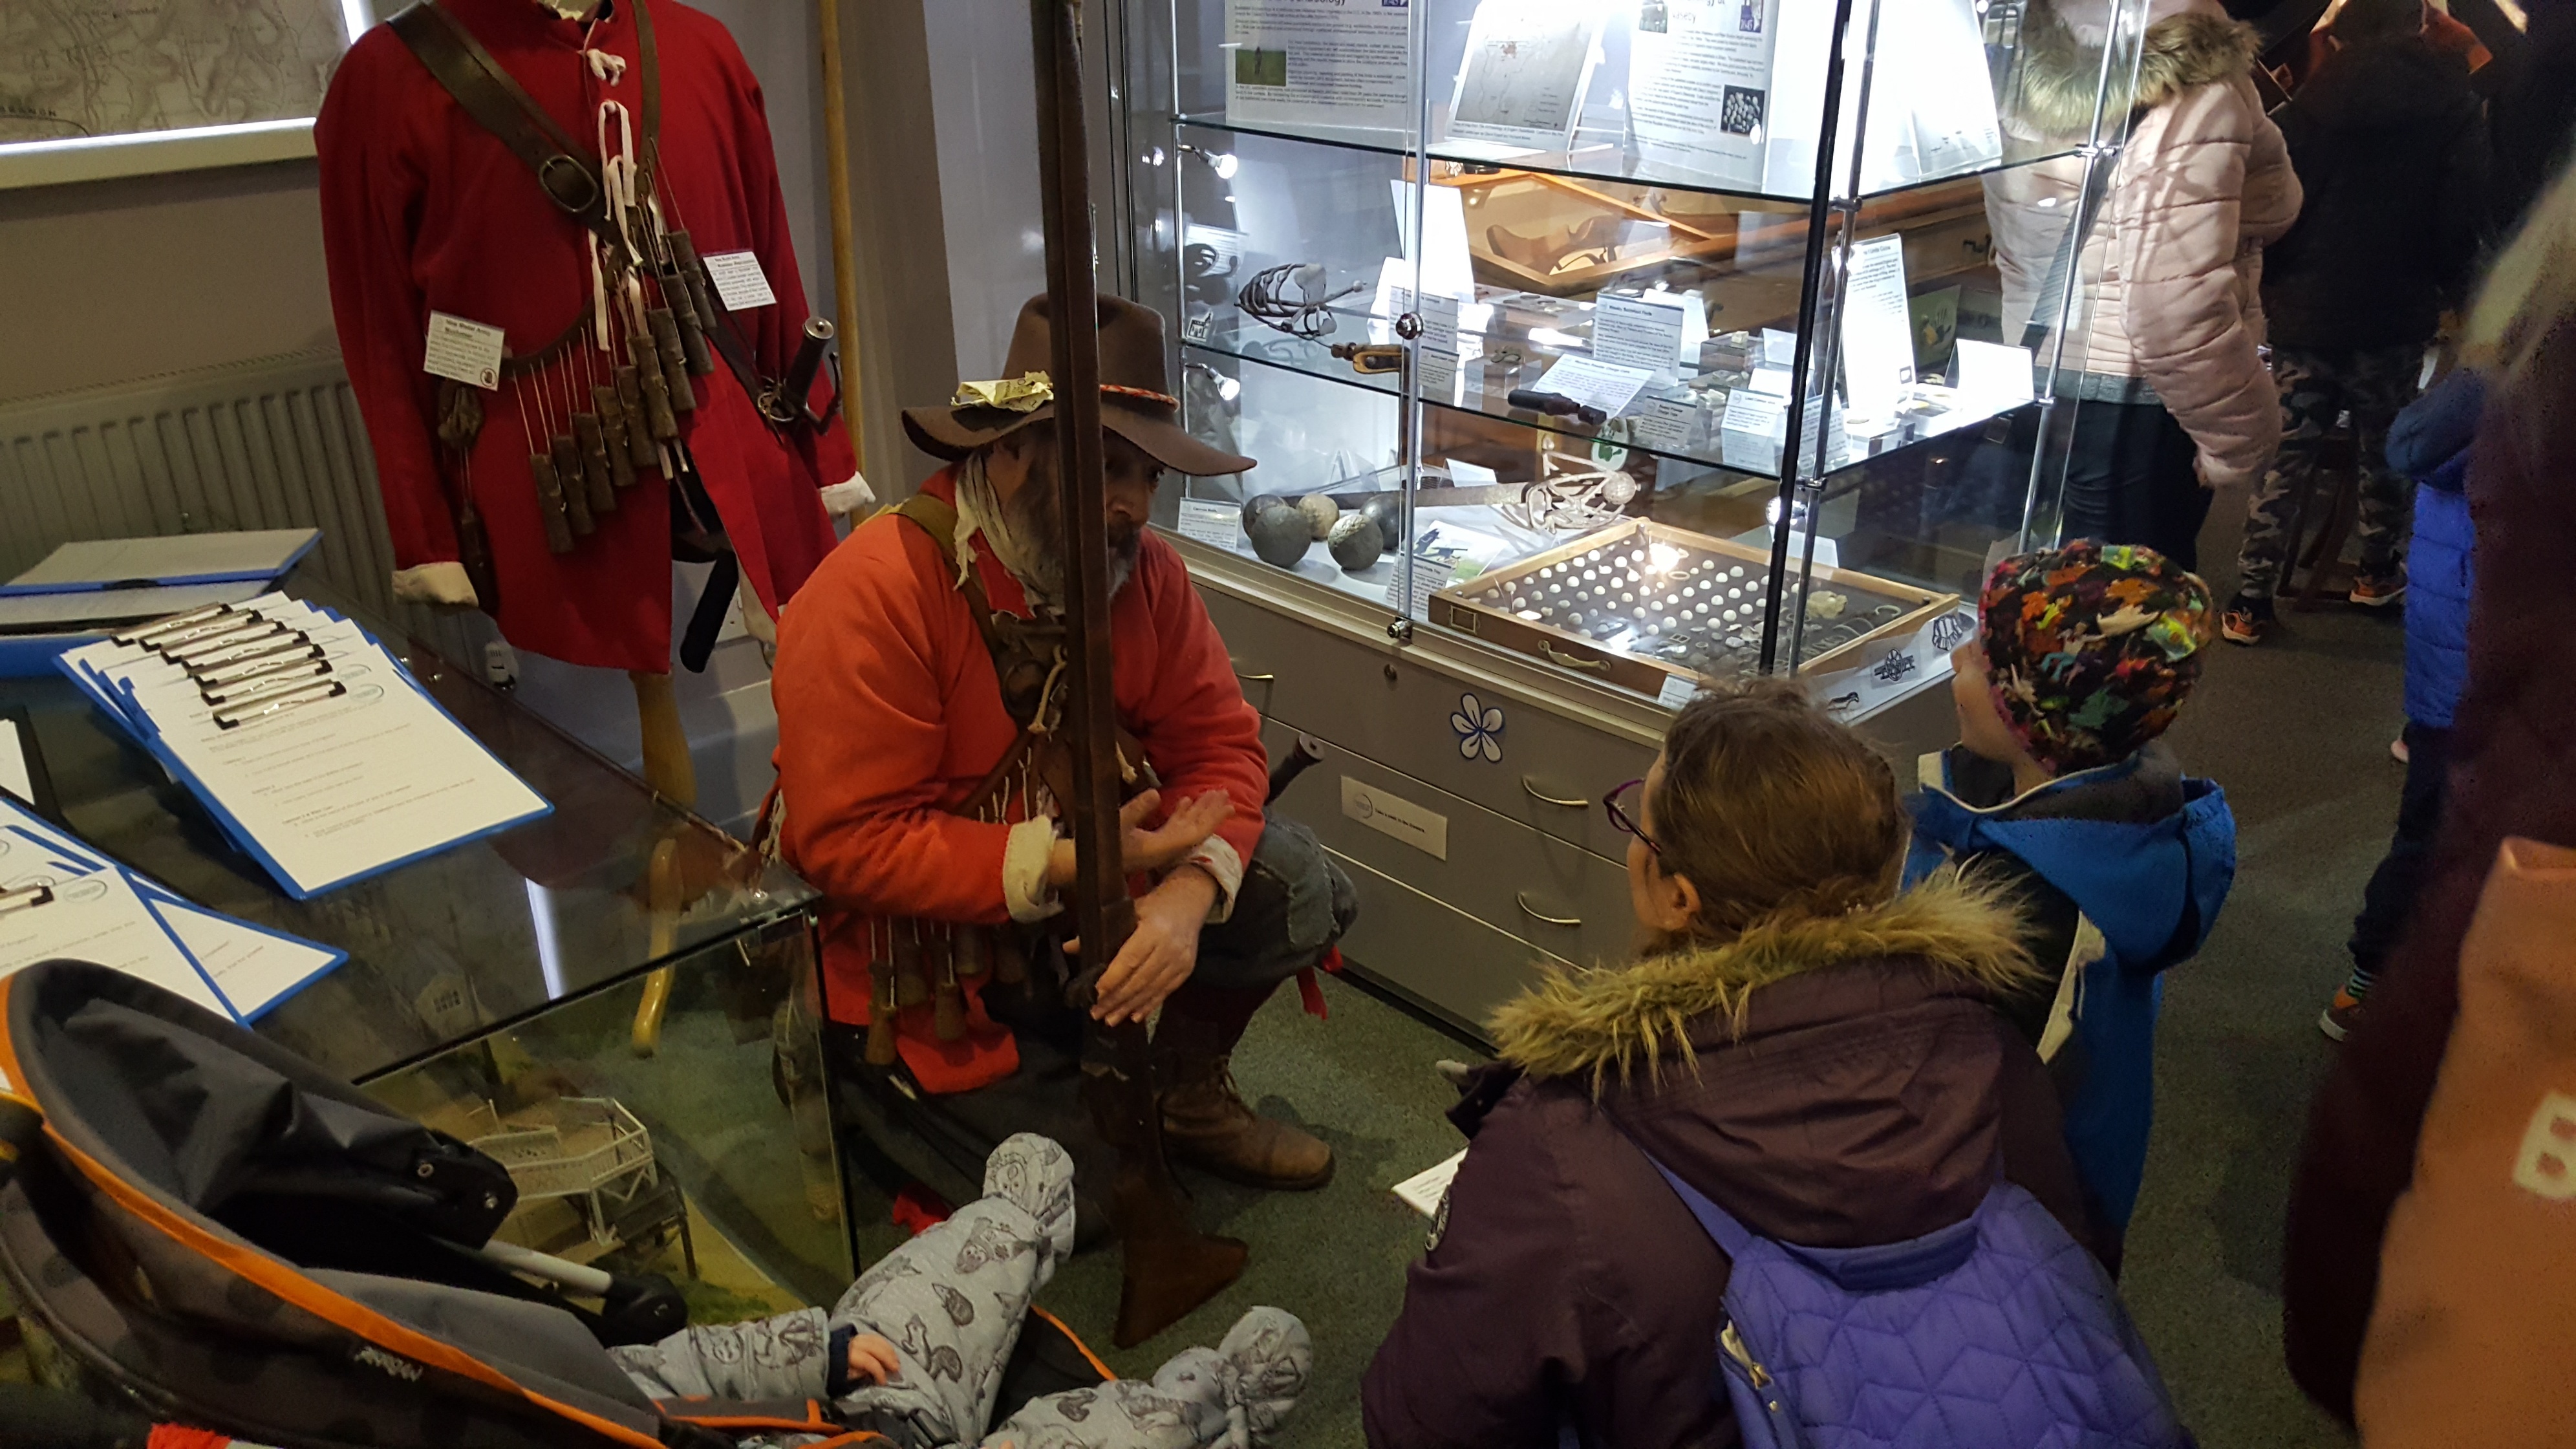
We were well supported by reenactors and show and tell enthusiasts …

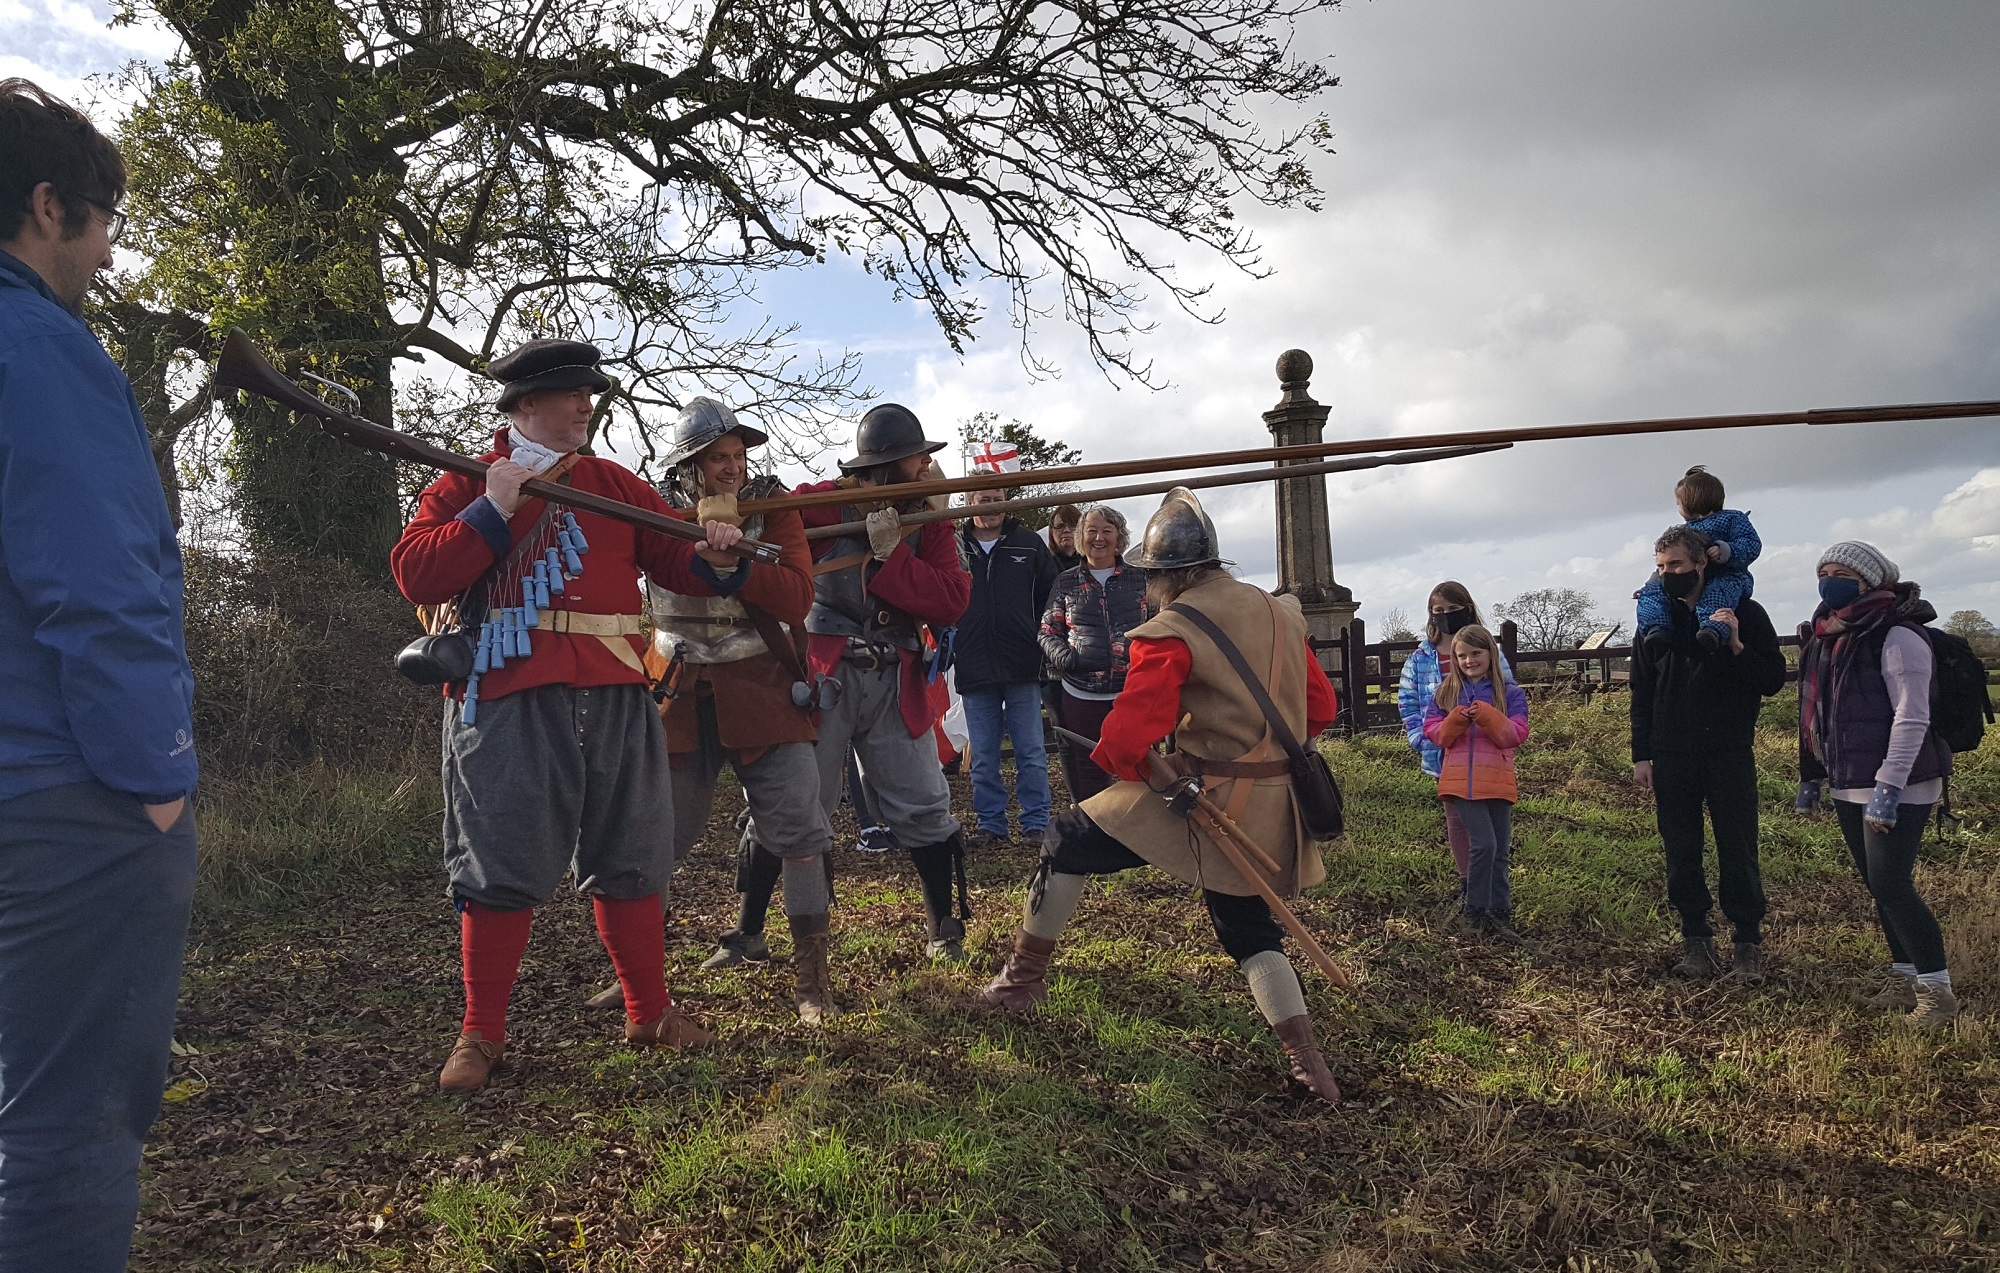
Although there is some foreshortening in the camera shots, the displays were also more spread out, so it was difficult to get everyone in.
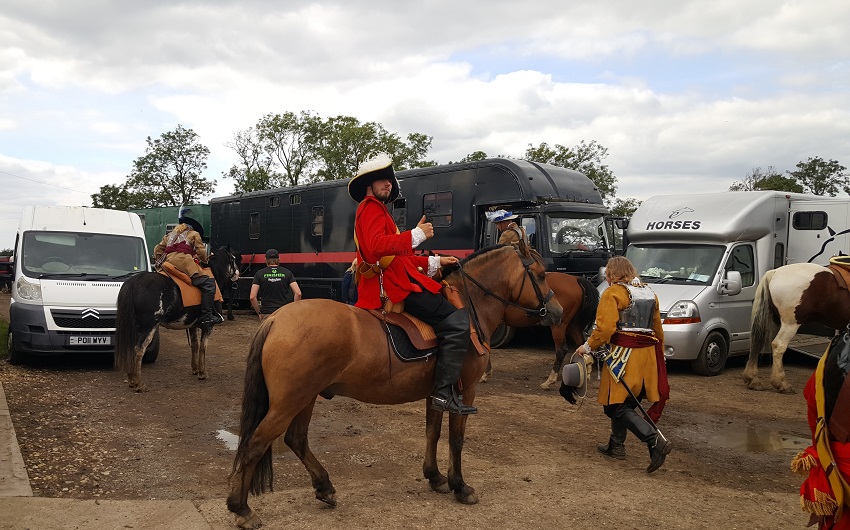
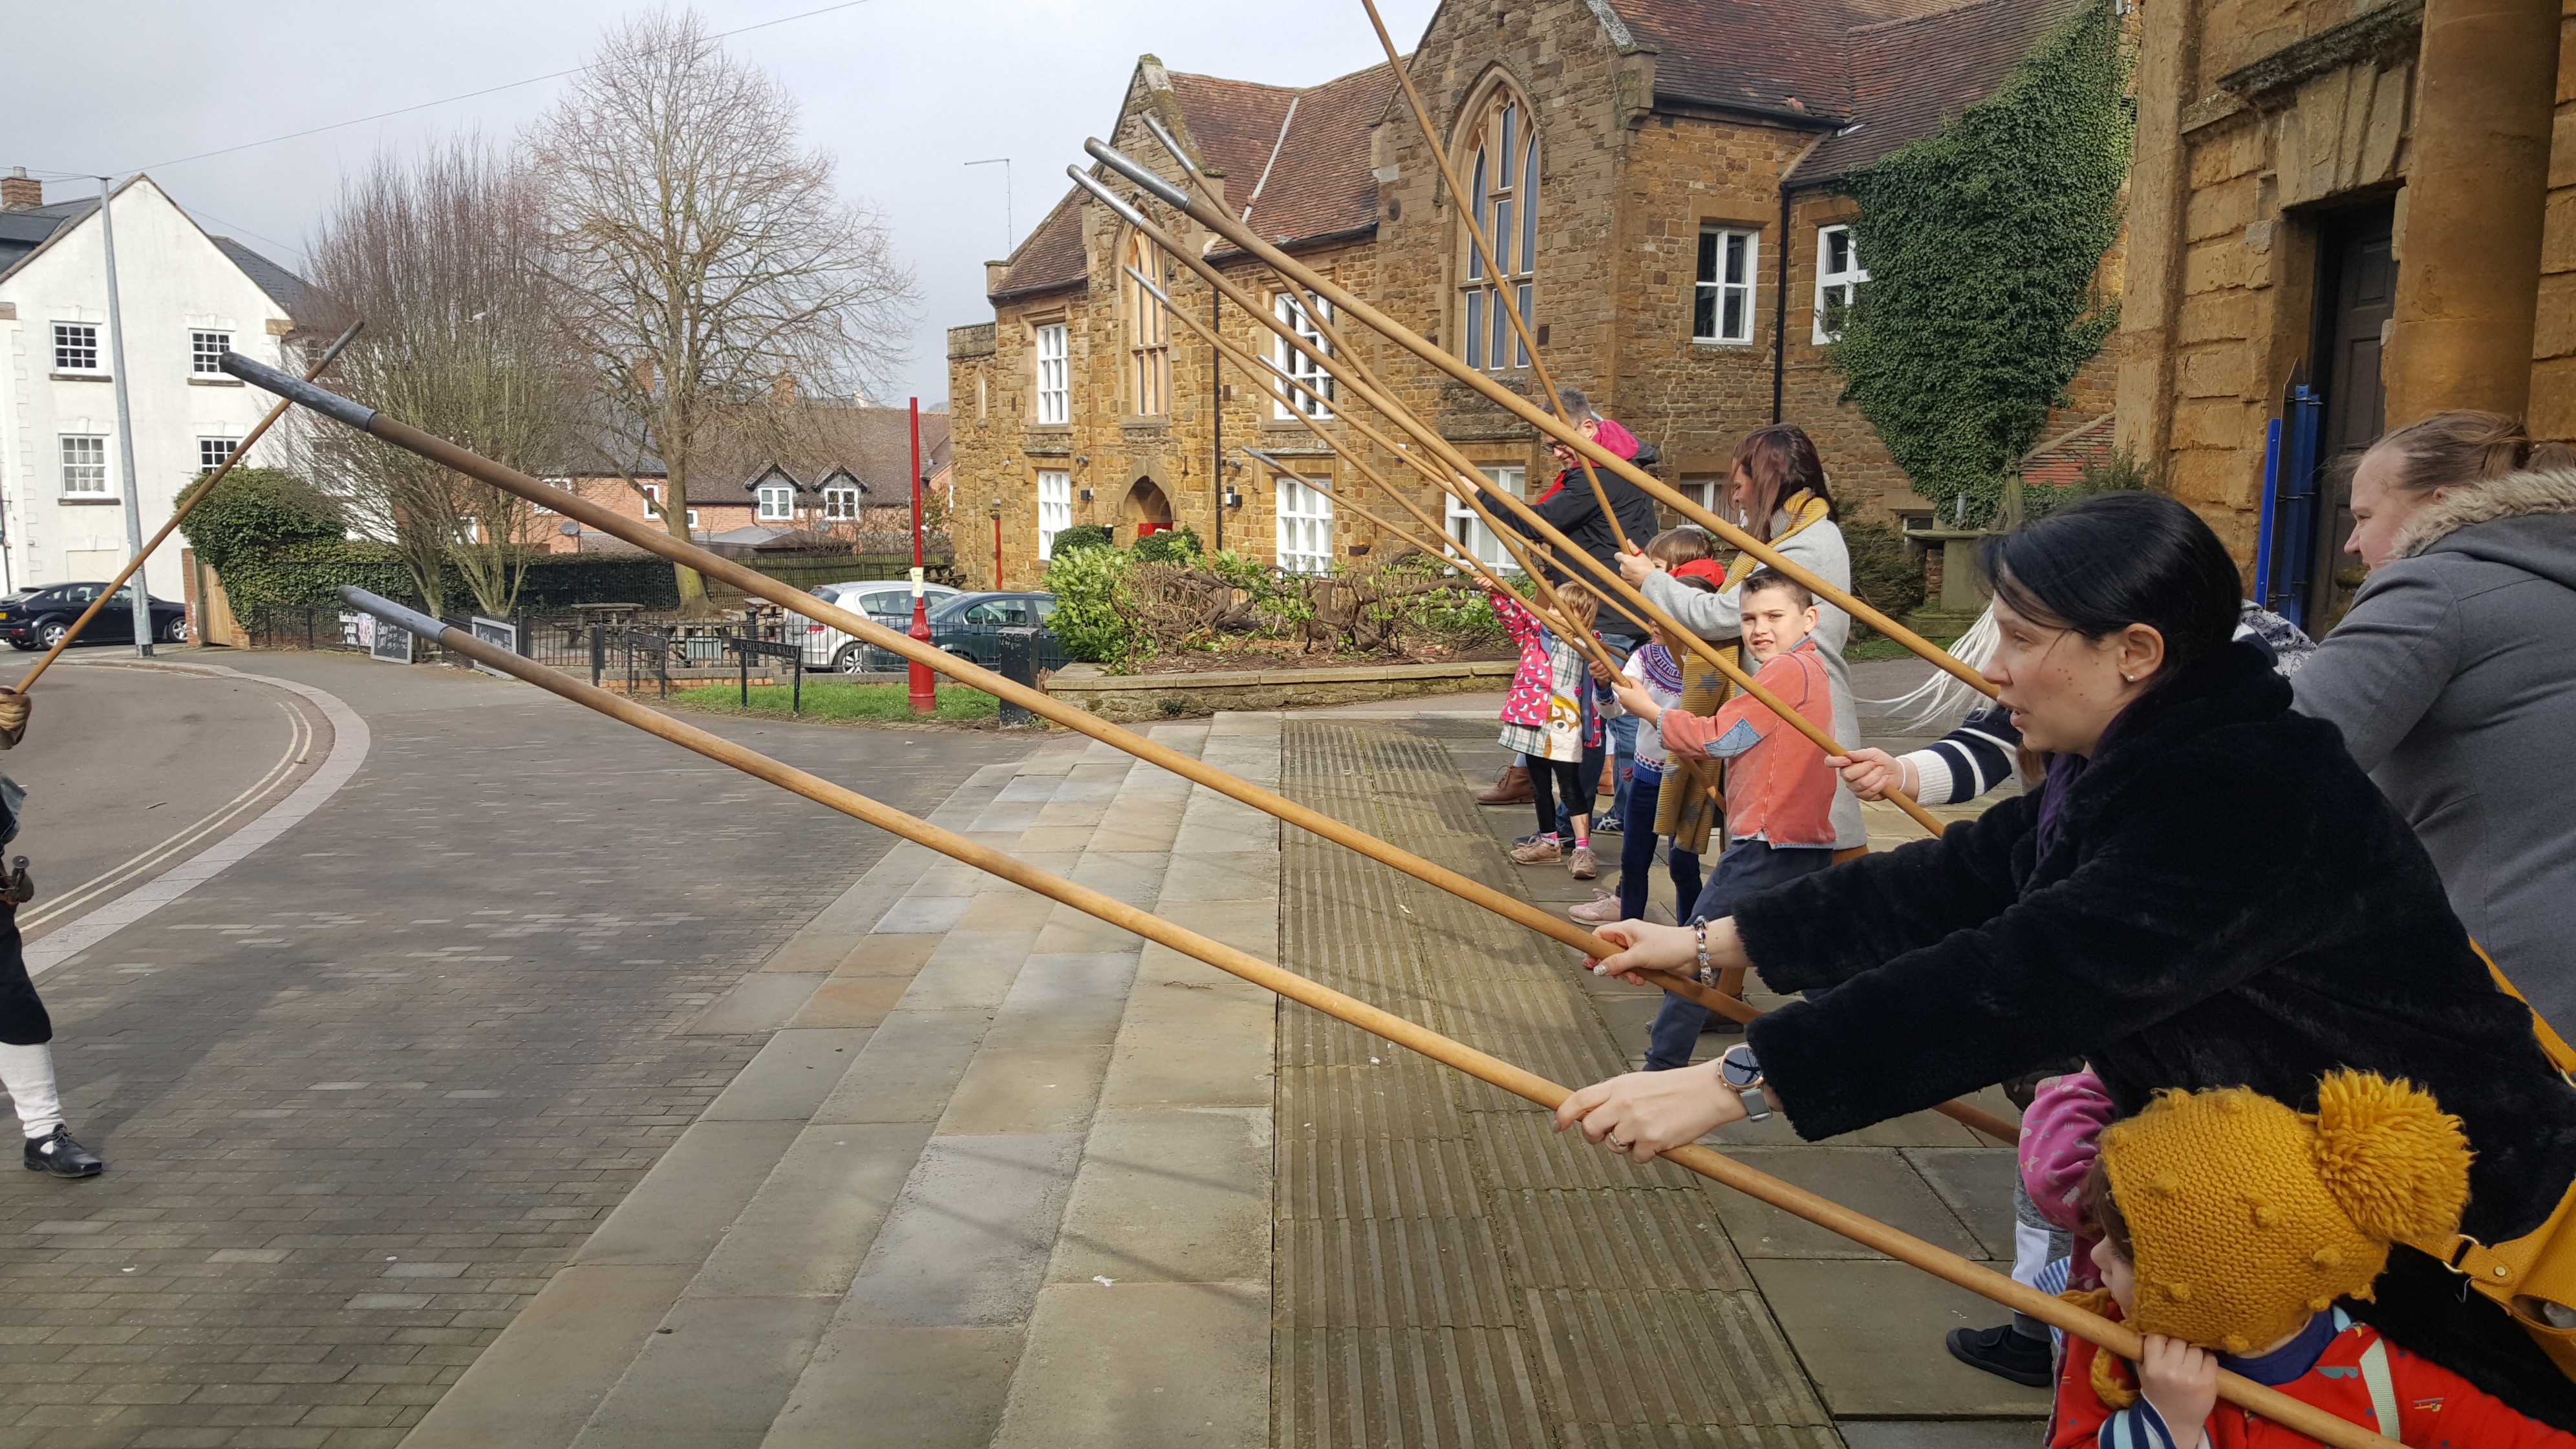
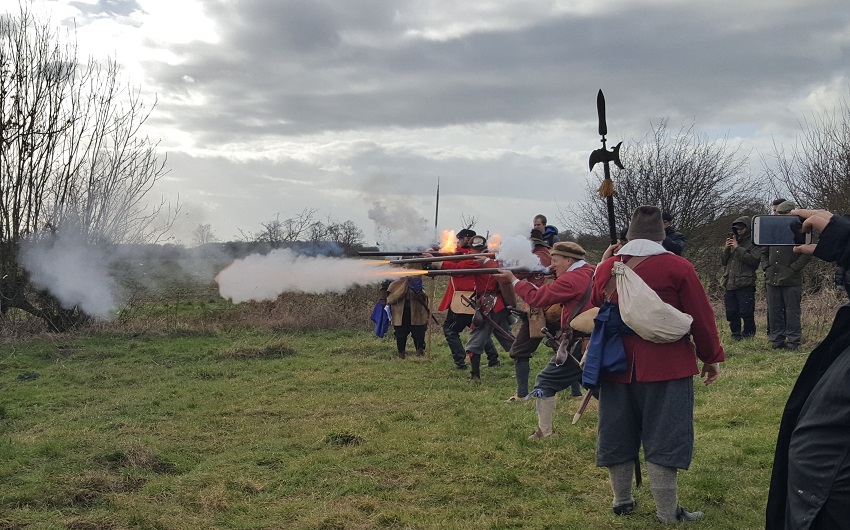
We had a number of horsemen too, who helped us explore the cavalry positions, charging up the slope, discharging pistols etc.

The foot gave us some volleys (although there were some hangfires this time around) …
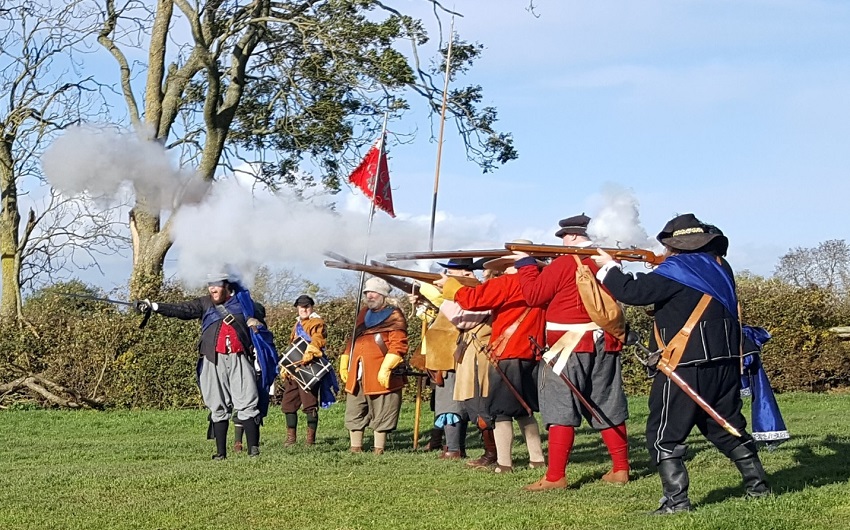 All in all, a good series of vignettes to support the narrative. We were lucky with the weather and the conditions underfoot, although, being Autumn, even some of the drier looking fields were muddy in parts (but Naseby is like that, and eyewitness accounts say it was quite soggy back in 1645, even in June) …
We ended the tour at R.O.C. taking an overview of the retreat phase – and just wrapping up before the rain hit us. Lucky again … the heavens opened as did the Royal Oak.
Thanks to everyone who has contributed over the Summer to keeping Naseby battlefield an active and eccessible heritage site.
Very sadly, Martin Marix Evans, stalwart of the Naseby Battlefield Project and founder member of the Battlefields Trust, passed away in the early hours of Thursday morning after deteriorating complications after contracting Covid-19.

Martin was a tireless campaigner for battlefields heritage and preservation, and a founder member of both the Naseby Project and the Battlefields Trust. He was one of the ‘gang of 3’ who metal detected and logged the battlefield at Naseby and led the campaign to protect it from the building of the A14, then subsequently of the campaign to build a Visitor Centre fitting to the status of the battle that decided the struggle for Parliamentary democracy in Britain.
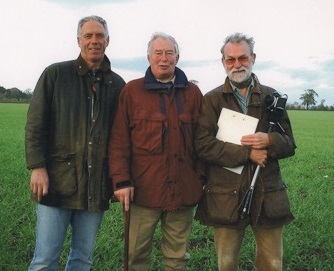 (The Gang of Three: Martin Marix Evans (right) with Peter Burton and Mike Westaway)
Martin was very much a mentor to me when I got involved with the battlefield project at Naseby, and talked me through a number of issues when I began the battlefield model that has regularly featured on this page. It is a familiar story, as so many will attest to his boundless enthusiasm and selfless support for fellow activists, historians and volunteers.
Many of us last saw him at the launch of the Naseby exhibition at Daventry Museum, a genial 80 years of age and still holding a torch for the Battlefield Project. He will be much missed by all who knew him and by all who value our shared heritage.
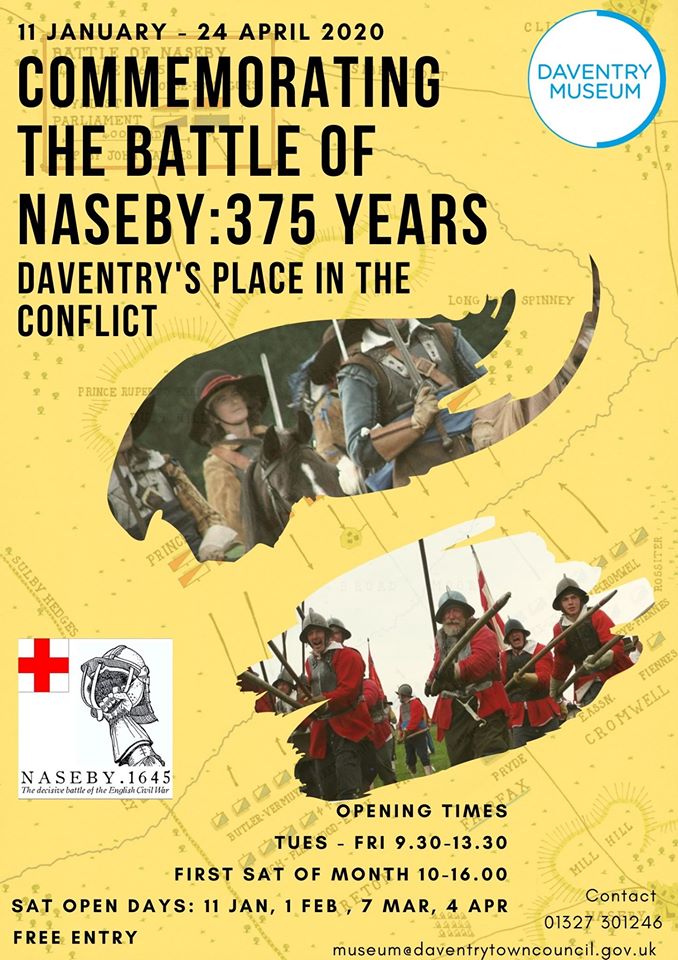
A collaboration between the Naseby Battlefield Project and Daventry Museum with the assistance of the Sealed Knot. Opening Day 11th Jan 2020.
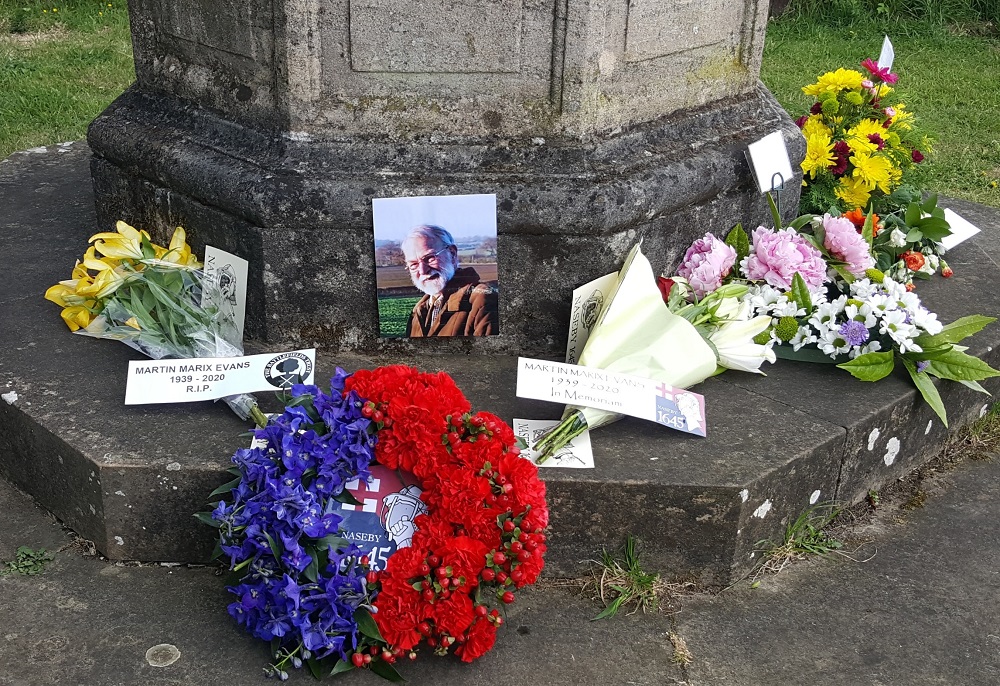
 (Naseby Battlefield – a poignant reminder on a field of conflict)
This is by way of catching up. It has been a busy year both on and off the battlefields.
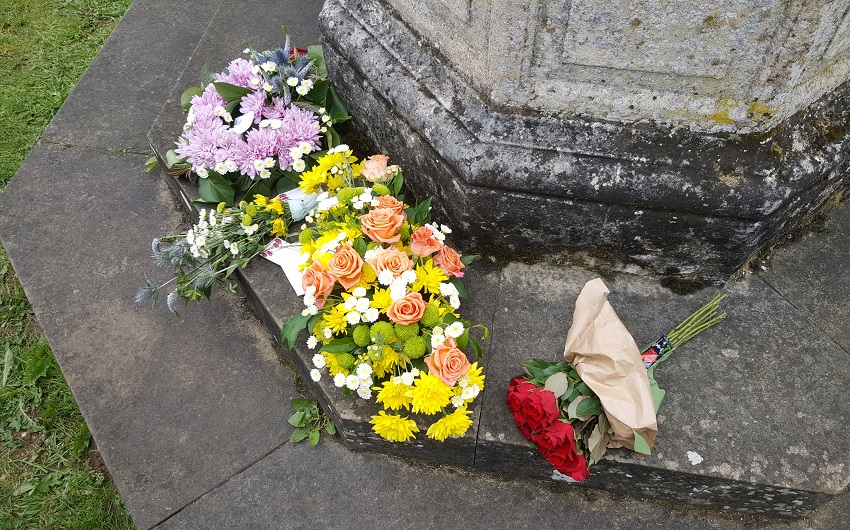
But I open with shot of memorial flowers at Naseby on the anniversary: we interpret, renact, refight, and commemorate acts of heroism, sacrifice and war in which countless lost their lives and we respect their part in our history. We respect their stories and we demand that, out of respect and out of an understanding of our national story, these places are protected and preserved.

If that wasn’t justification enough, these fields of conflict are also home to a great diversity of species, and their conservation. Earlier in the year I took some pictures of the dragonfly pond and interpretation panels at the Sulby viewpoint at Naseby. These are examples within the wider subject of battlefield ecology and are reference material both for a book in preparation and an international conference this year. I confess it isn’t really something I’d thought about.

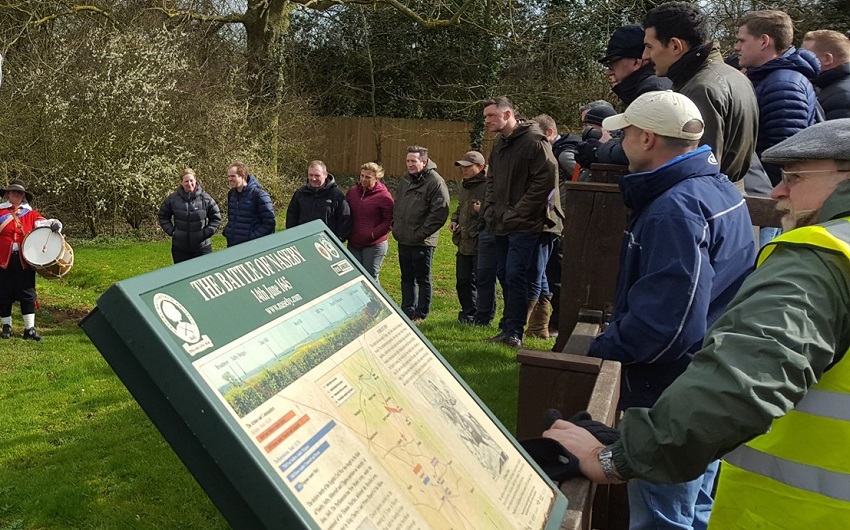
Around the same time, Mike and I, as the local battlefield guides, were planning out the events for the first part of the popular visitor season and the anniversary weekend. It was to feature a keystone visit by the royal Corps of Signals who had chosen Naseby as a working example of military operations in action.
 (At the ROC viewpoint, planning tour itineraries)
 (Royal Corps of Signals pose with reenactors at Sulby viewpoint at the end of their tour)
 (Martin Hackett and friends – another specialy arranged outing on Naseby field)
 (some of the reenactment content for the Army tour: a reconstructed dragoon by Sulby hedge)
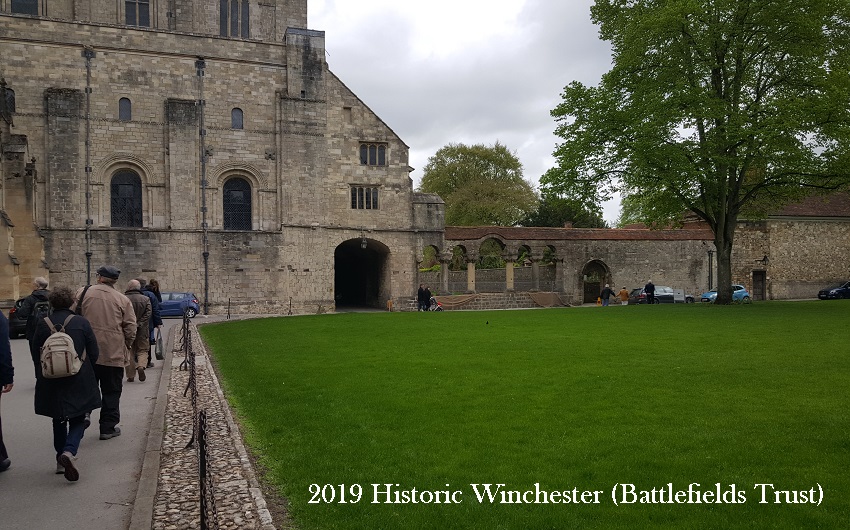
Civil War battles featured strongly (as ever) at the Battlefields Trust conference and AGM (this year hosted in Winchester) which took battlefield archaeology as its theme, with talks on methodology, an update on the search for Stow battlefield (and evidence) and a visit on the Sunday to Cheriton.
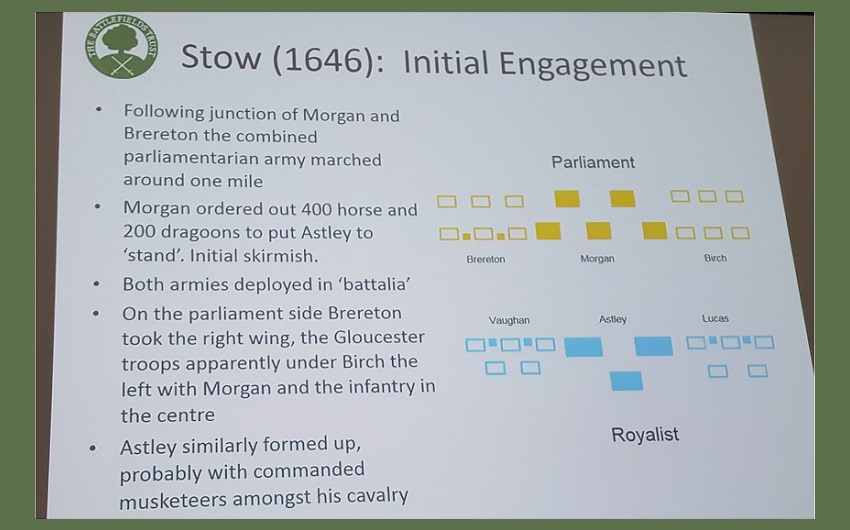
Stow is interesting as, if you go by Brereton’s own account, it is already over by the time he writes his report from Stow Market Place at 8am – which gives an extremely tight timeline for an encounter outside the town with troops falling back into it (dawn is about 5:30 in mid March). I have always thought the traditional battlefield is too far from the town to suit this timeline.
 (Development Officer Julian Humphrys interprets Cheriton)
Back at base we had the usual problems ‘heritage professionals’ generally fail to grasp. we get people to car share on tours but we still have huge issues cramming the vehicles in. There simply isn’t the capacity at battlefields like Naseby to cope with the demand whenever we put on events or just run a tour.

While other attractions have money poured into them yet fail to reach their target numbers, battlefield sites struggle to get permission and funding to extend lay-byes or put up signs (indeed, one of the key campaigns at Naseby in the first part of the year was to stop Highways England taking down some of the signs we had already got – which were considered distracting clutter).
 (2019 anniversary visitors survey Naseby field from the Cromwell monument)
Nevertheless the show goes on and in addition to a Winter tour, we have a school visit, a tour with a writer developing a play about the battle, the Arts Council, and a new link up with Daventry Museum all in the diary. It’s quite busy given that the established view is that people aren’t interested in battlefields.

In a unique event to commemorate the 375th anniversary of the formation of Sir Arthur Haselrige’s famous regiment of horse, the present Lord Hazlerigg hosted a small group of reenactors and historians at Noseley Hall in Leicestershire, in the family’s ancestral chapel.
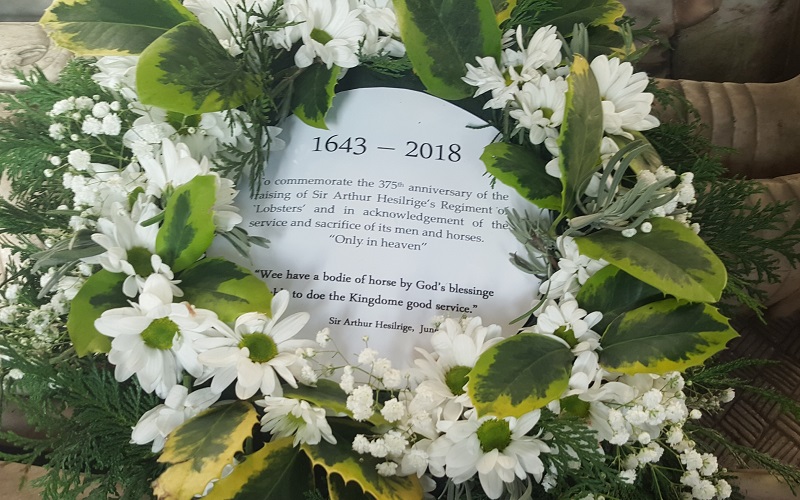
The medieval chapel holds the family tombs in particular of Sir Arthur, where wreaths were laid and a small service of commemoration and reconciliation was observed.

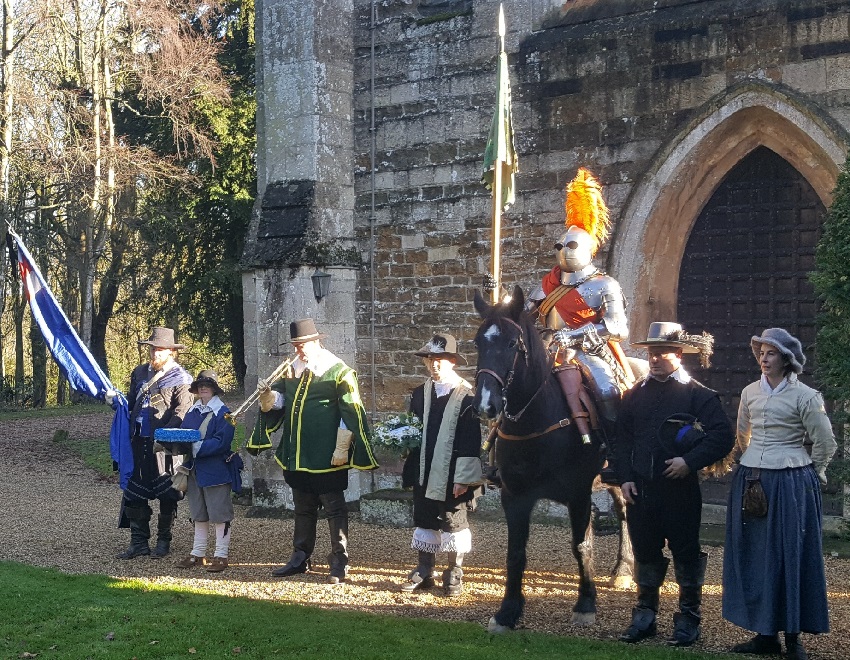 (representatives of Haselrige’s regiments of horse and foot outside Noseley Chapel)

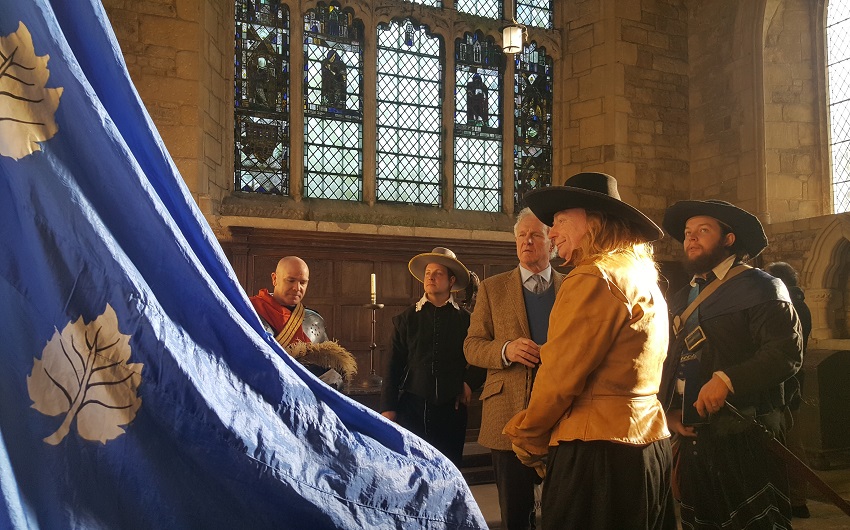 (the present Lord Hazlerigg with members of the modern historical groups)
So a remarkable bond was established between the historical figure and the enthusiasts who take today’s commemorative battlefields in his name.


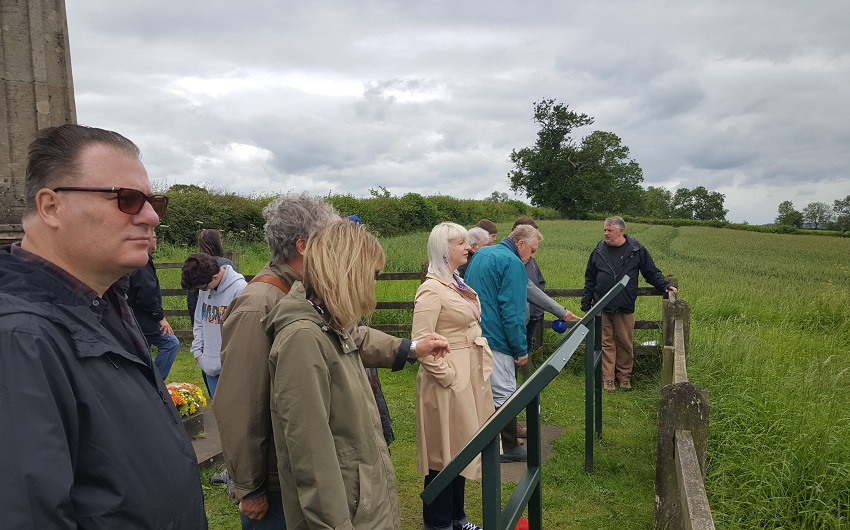
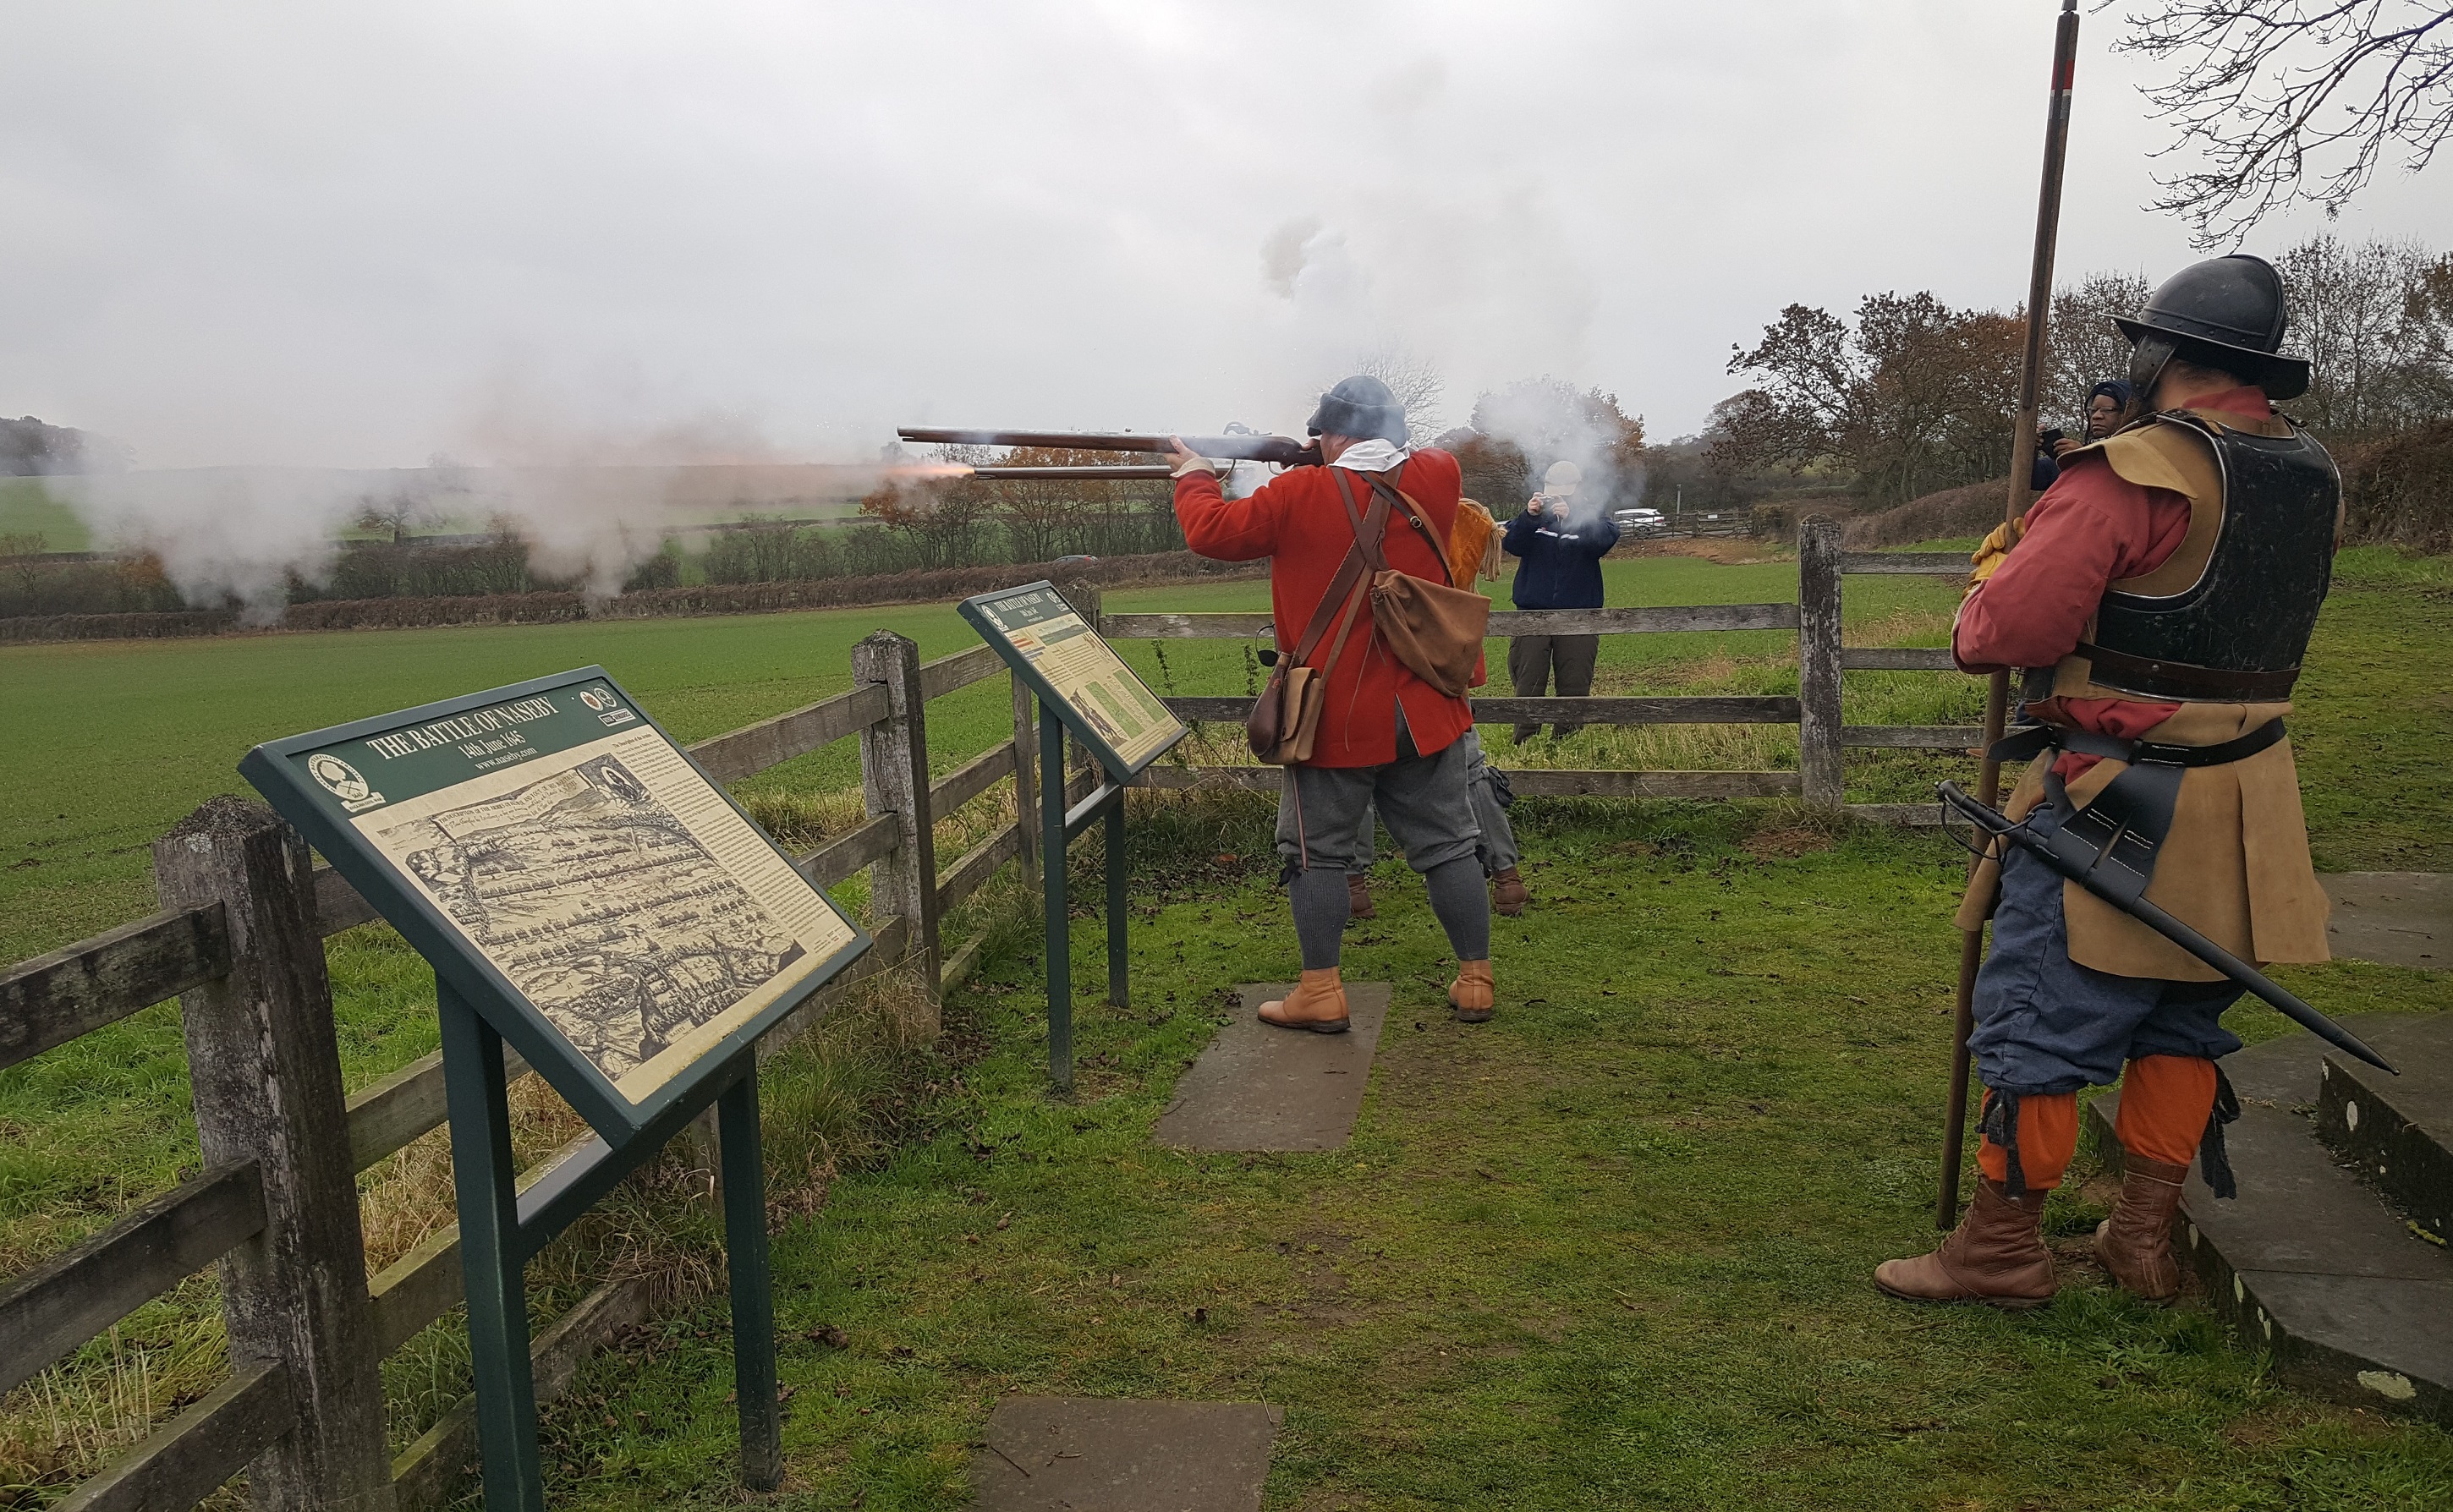
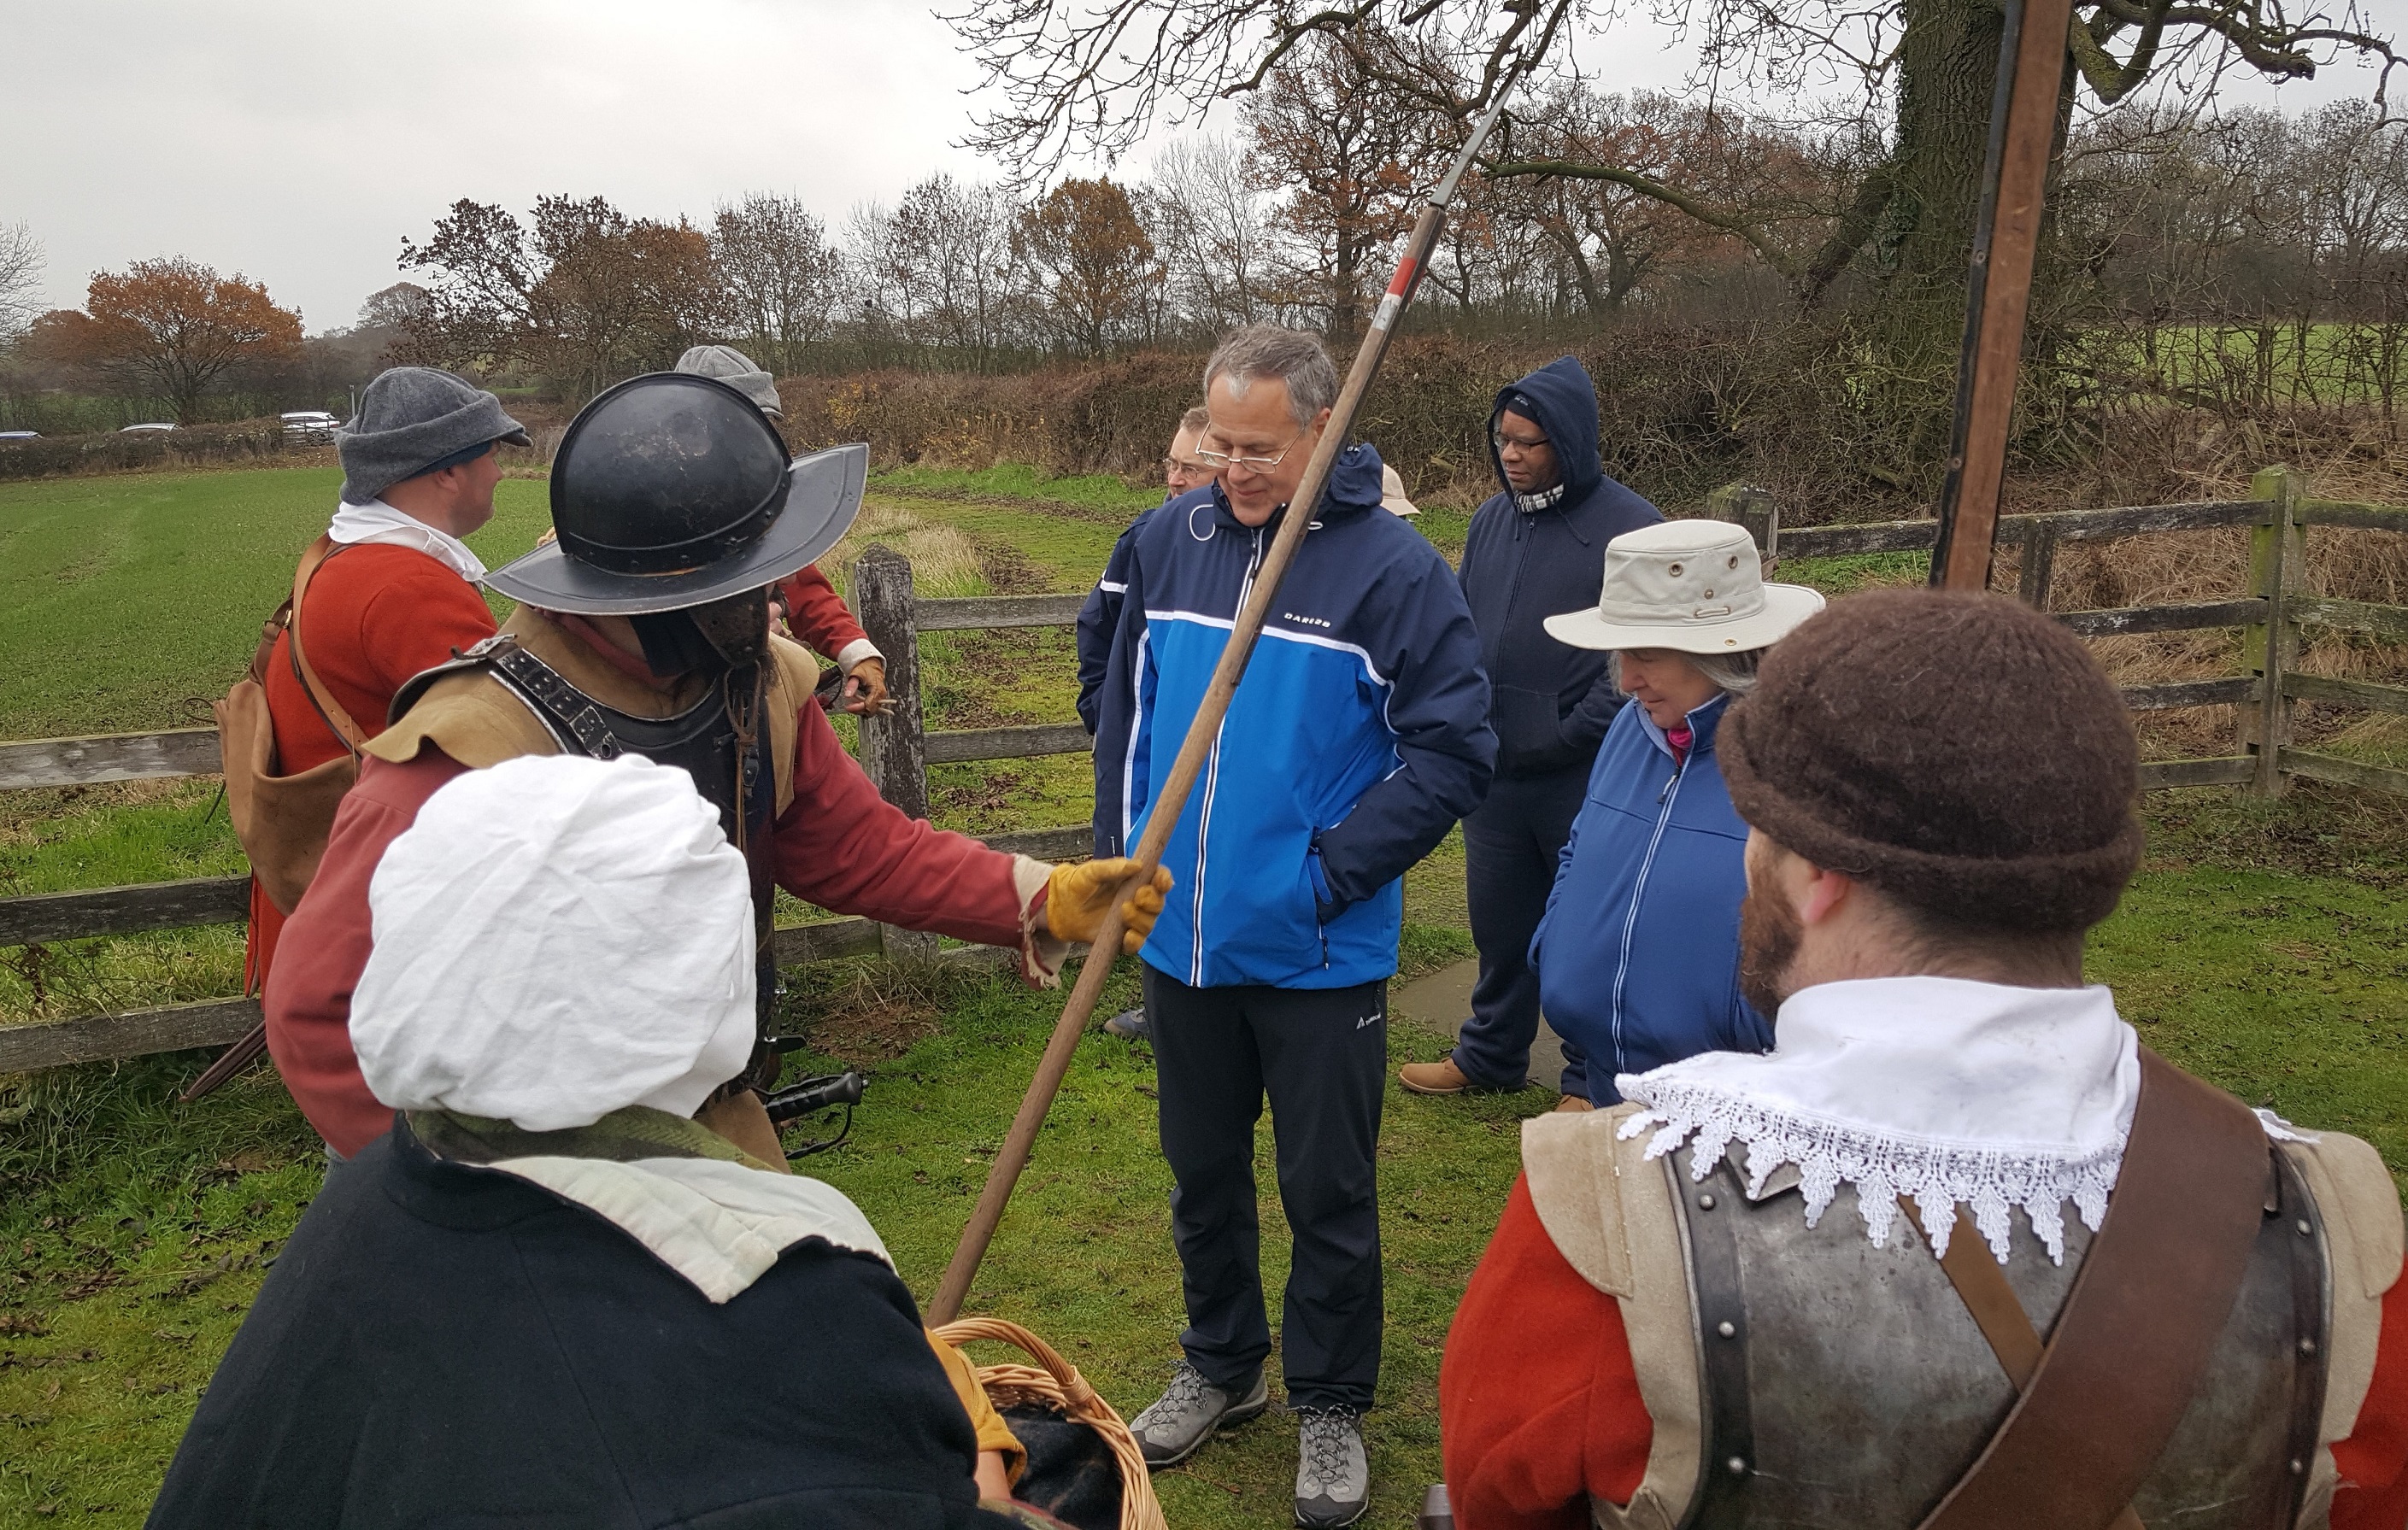
A few hardy souls braved the last weekend of November and joined Naseby guides and trustees for a trip around the battlefield.
In fact, the weather, though overcast, was kind.
Additionally to the now regular value added by reenactors and living history enthusiasts, a special event this time was the return of one of Okey’s dragoons to Sulby hedge.
 (New Model infantry at the Cromwell monument)
We looked at officers and ensigns at Fairfax, musketeers at Cromwell and everybody finished up at Sulby spotting the dragoon and firing off final volleys.

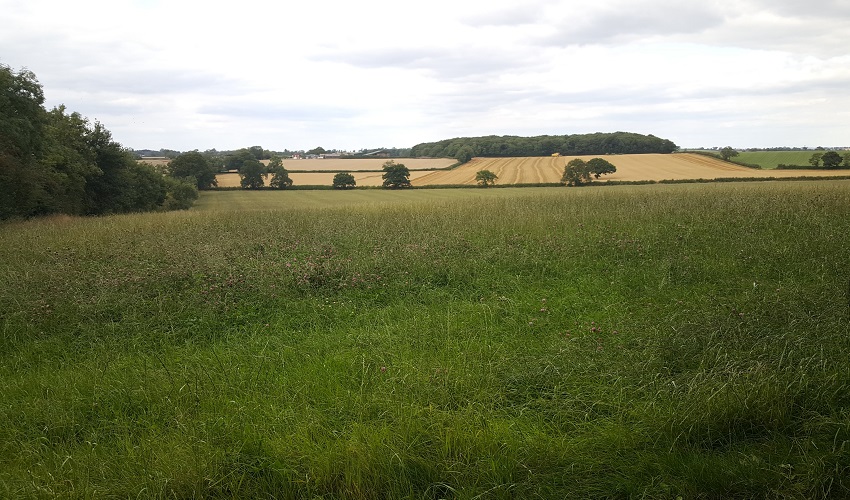
The views of the battlefield are relatively unobscured by foliage in Winter.
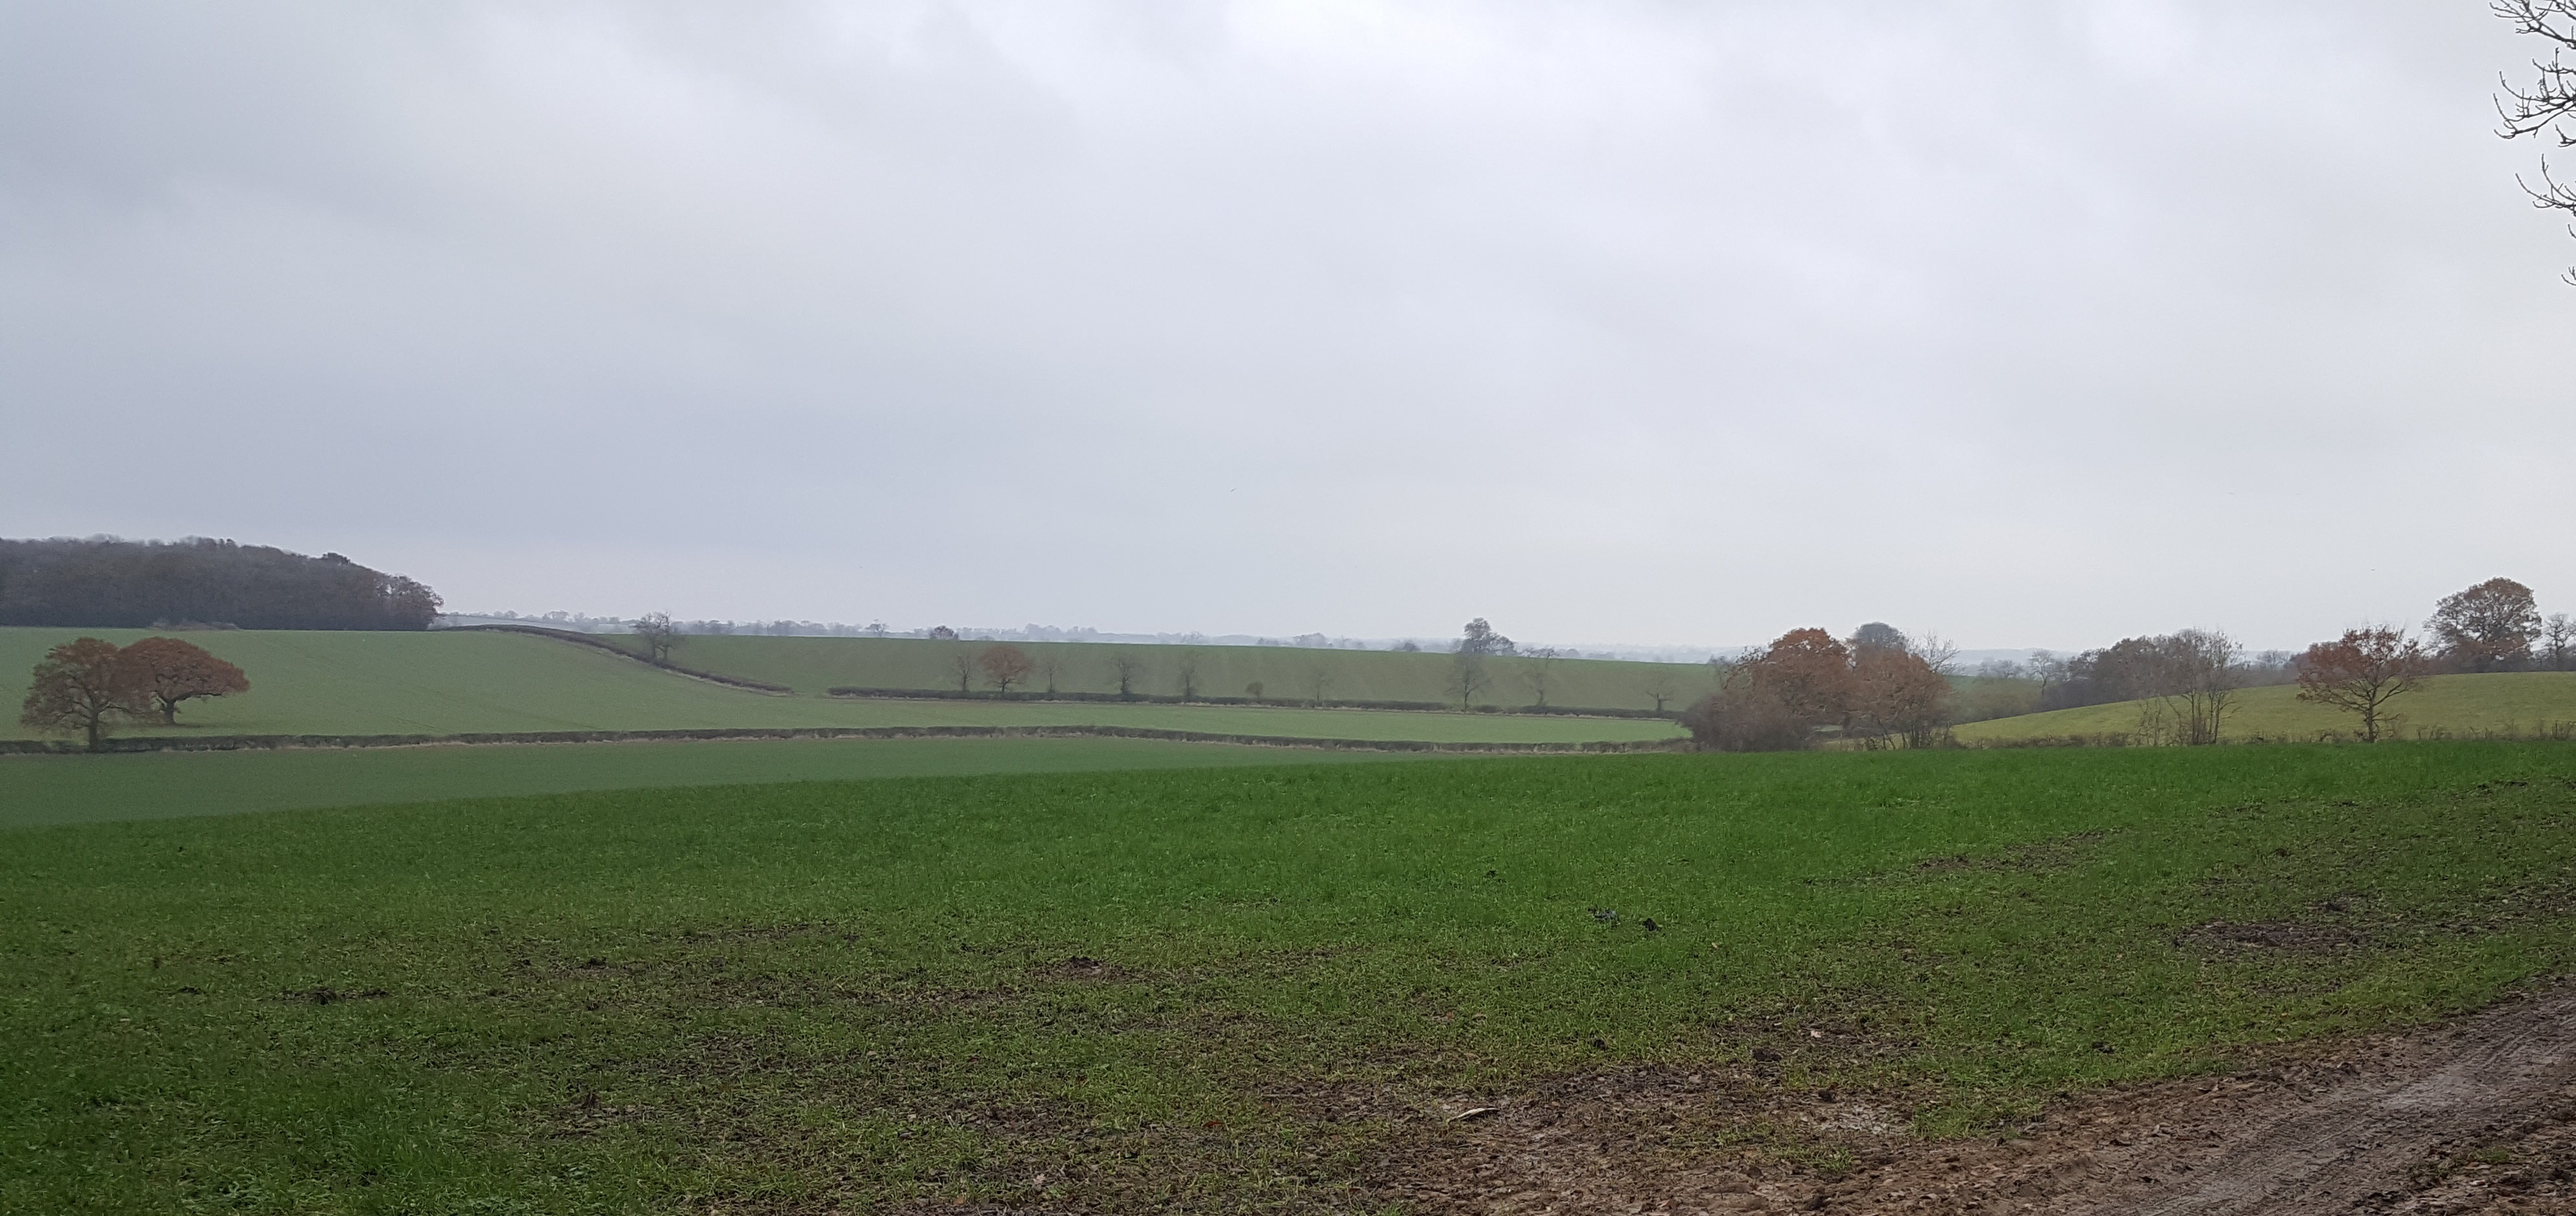 (the Eastern flank of the battlefield – where Cromwell’s cavalry defeated Langdale’s Northern Horse)
We had access to the paddock at Prince Rupert’s Farm for this tour, and the possibility of walking through to the Sulby viewpoint (so across the Royalist cavalry wing. Due to the weather, however (mud!) we opted to drive round.
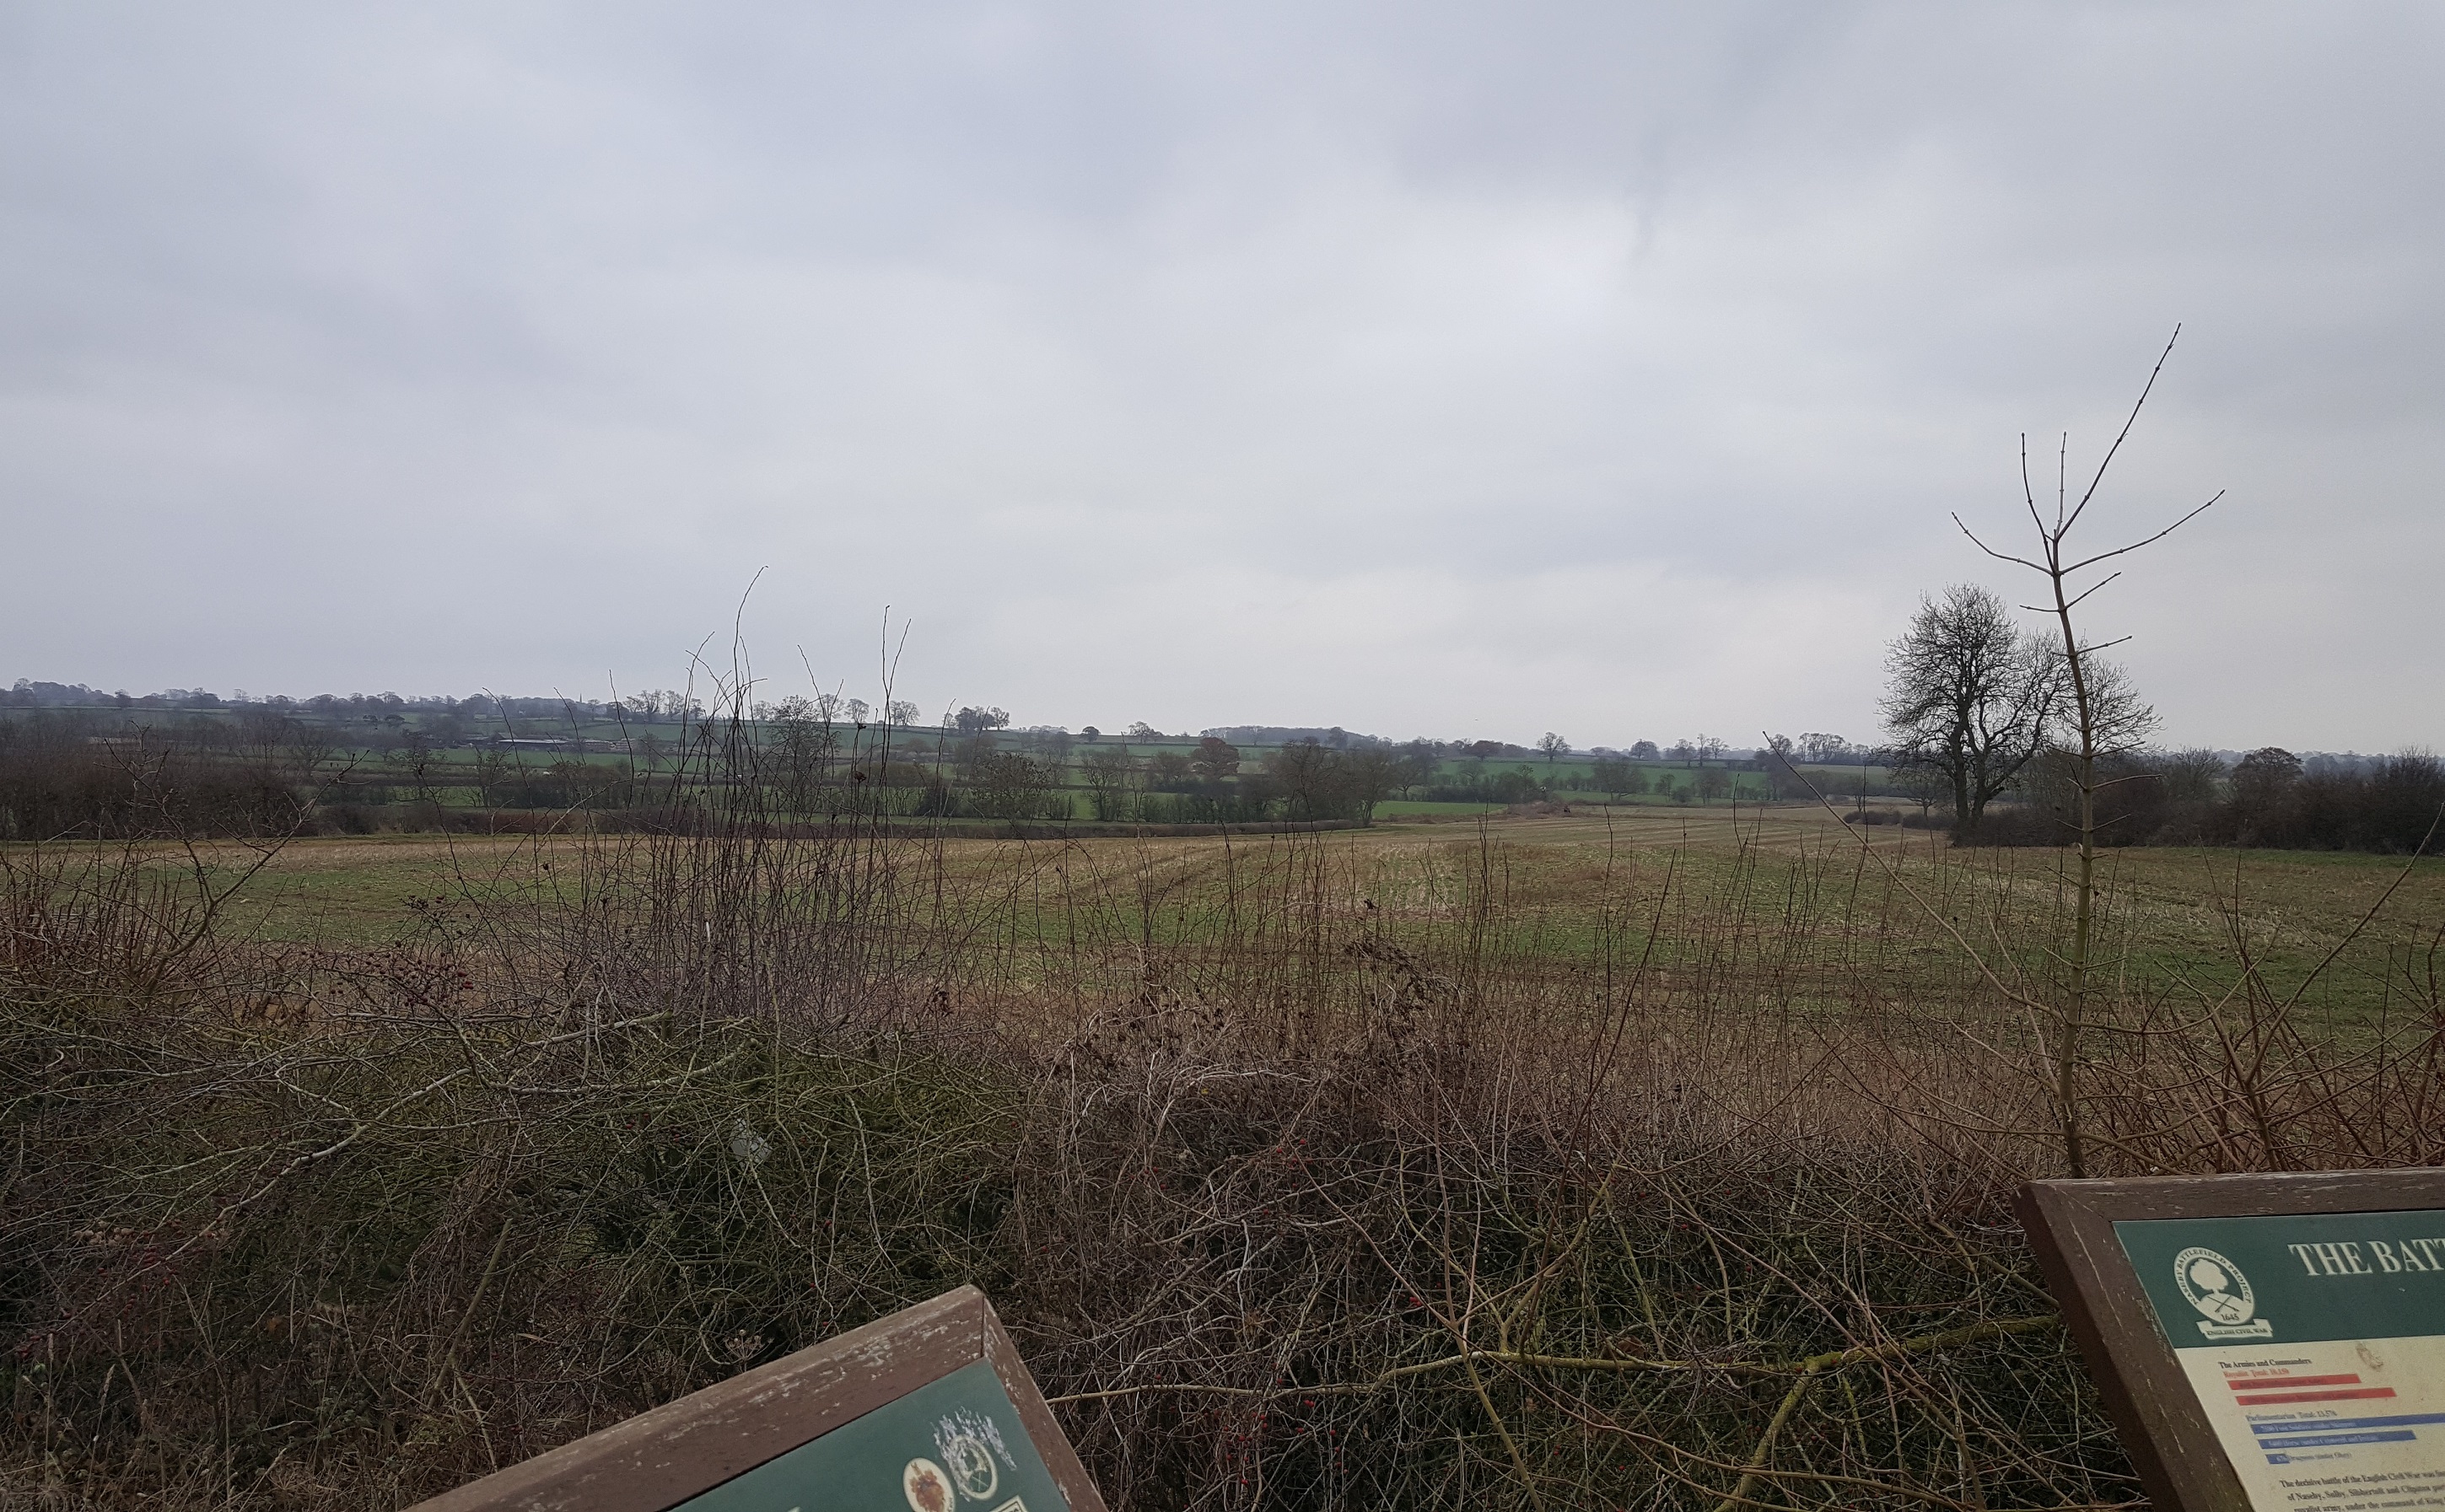 (the view of Sulby hedge – left – from the North: Okey’s men deployed in the field directly in front of you)
Here, dragoon Alan gave a splendid presentation – on horseback – of dragoon equipment and tactics … and cantered either side of the hedge so visitors could get a feel for the narrative …

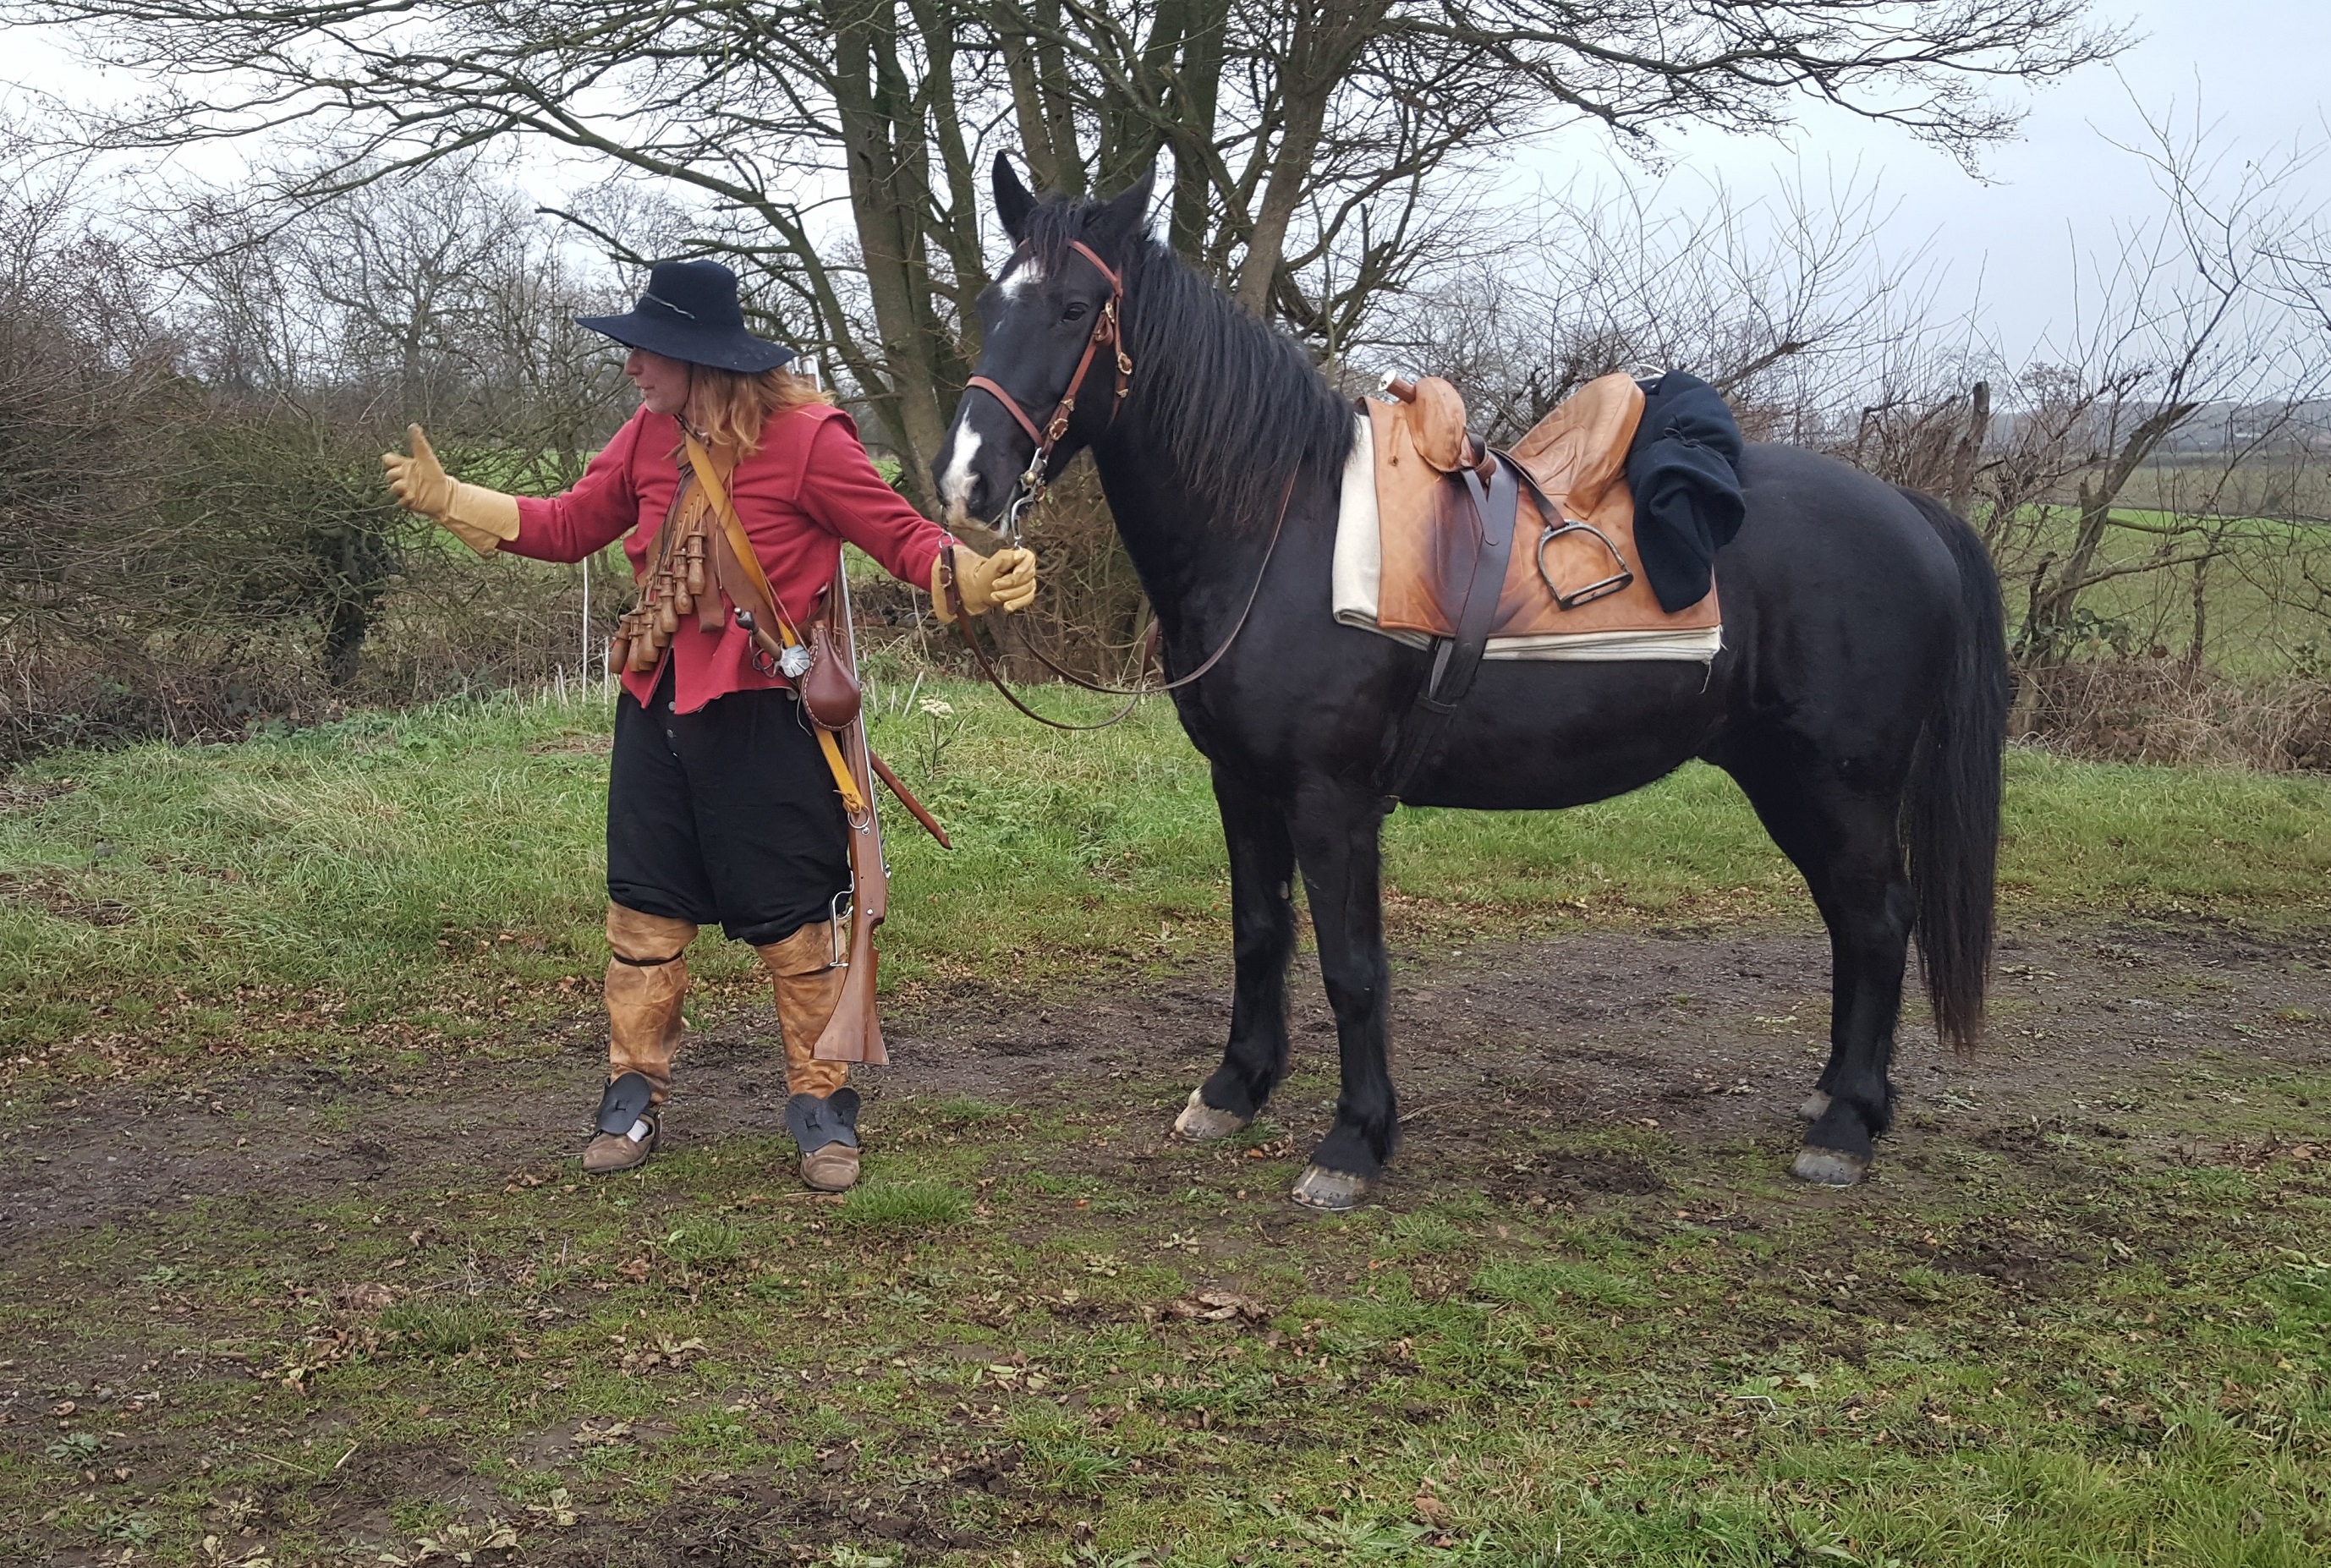
Menacingly seen through the foliage …

After which the musketeers delivered a final few volleys …

This was all tremendous entertainment for the visitors – and a cut above a regular battlefield walk … of course, Naseby is one of the best documented and securely identified battlefields in Britain, so as well as the costume and equipment, at Naseby you really are seeing the battlefield.
As for the hedge … well it will have changed a lot over the centuries … and it was probably much bigger then … and the battle was in June so it would all have been much more bushy …
Nevertheless, Okey’s story is one of those ripping yarns that needs to be explored further.

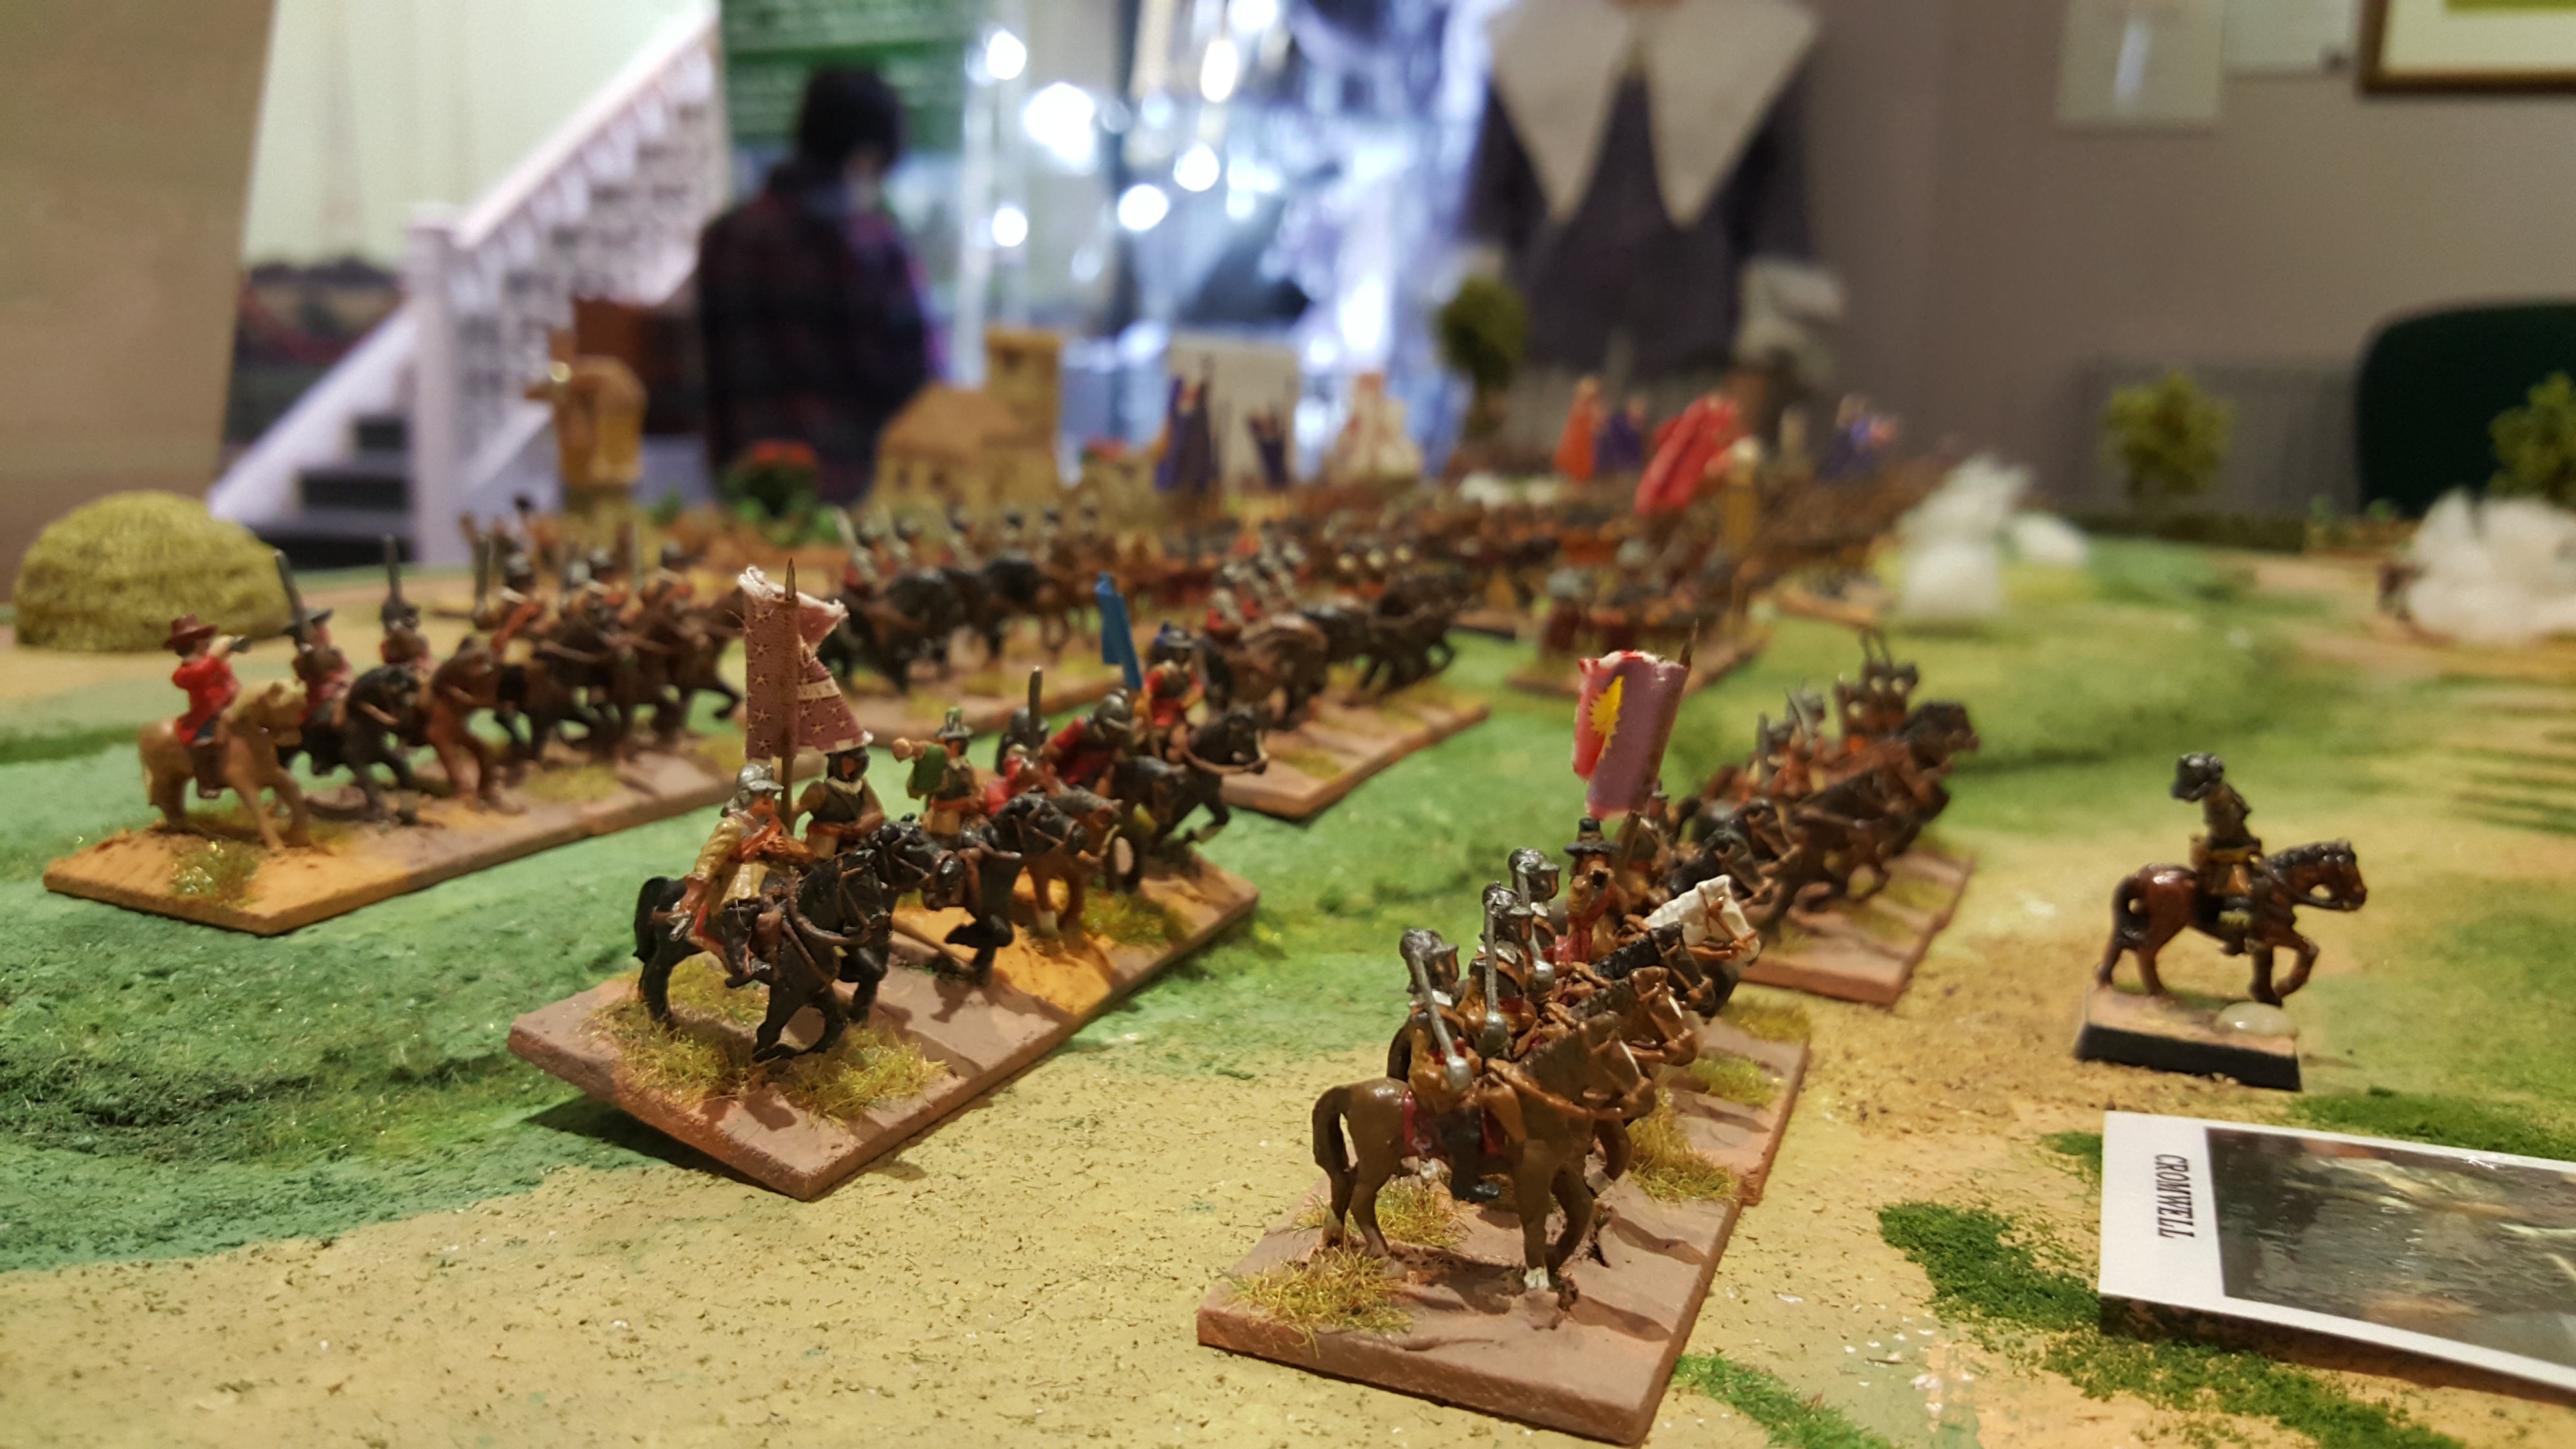
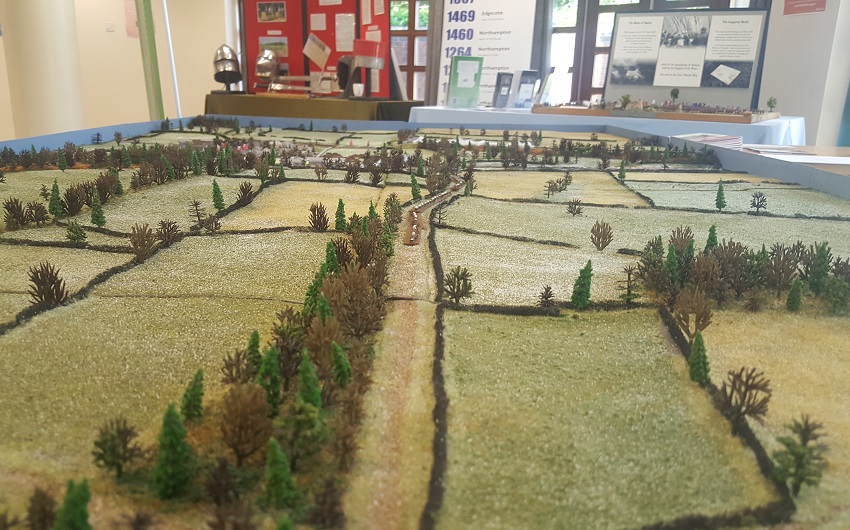
In amongst all the heritage events and campaigns, normal service has been maintained and, locally, we have continued to explore the Civil War and the challenges of reconstructing the battles in miniature.
The figures are Trebian’s.
St. Fagans
St Fagans (1648) was a peculiar affair in which a small Parliamentarian force terrorised a much larger rebellious ‘army’ near Cardiff. Our game was a follow up to CoW, where Mike E had put on a session using his own mechanisms.
The game requires a significant strength/morale loading in favour of the New Model troops – but in this case seemed something of a forgone conclusion. Mike has taken on board some of our feedback so there may be more to on the battle and Mike’s thinking to come.
Marston Moor
… (or: Trebian gets all his toys out) …
In which we returned to squares and to Richard Brook’s Victory Without Quarter.
Now I have refought Marston Moor on a number of occasions … notably with the old Pike & Shot Society display team and their colossal game (part of which fed recruits into my own Naseby model) … Marston Moor was a big affair and involves quite a lot of manoeuvre, deploying off the march and grand cavalry sweeps.
 (Marston Moor … 15mm figures from the splendid Peter Pig range)
Which is everything that you want from wargaming a great battle – but is also a test of game rules and game management. In this game we used quite a bit of the original game’s card management and it did make the game feel like a trudge rather than a sweep.

I think Marston Moor is one of those iconic battles -one you want to be able to refight on the wargame table with entertainment, authenticity and flexibility in equal measure.
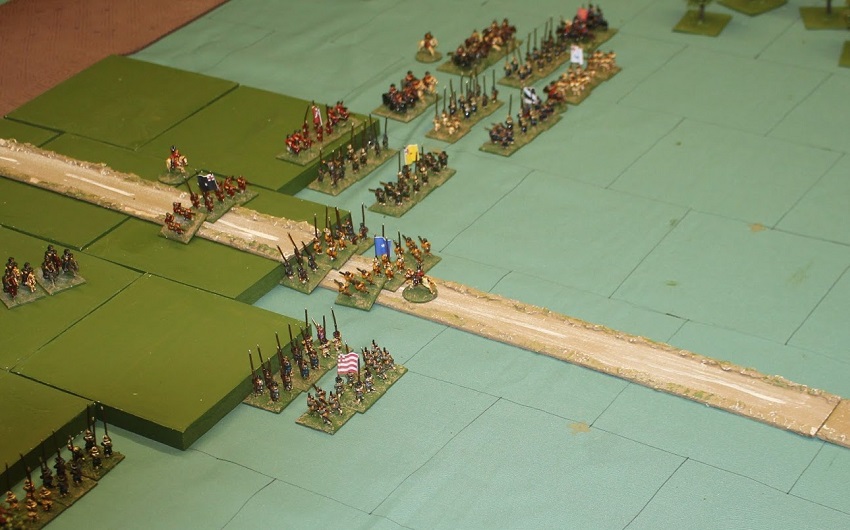
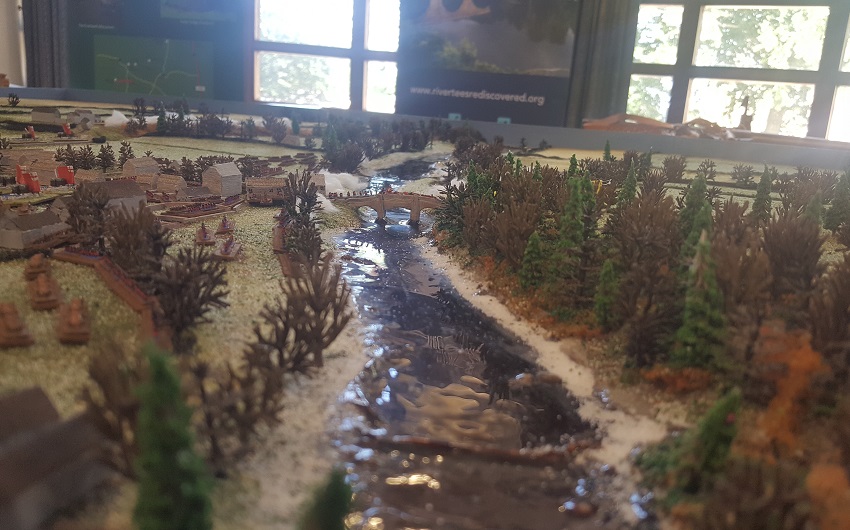
CROPREDY BRIDGE
Cropredy is an awkward affair to reconstruct … essentially a grand (and rather unmanageable) ambush … an operational level battle with troops on the move … potential issues of surprise, visibility, nightfall, command distances etc.
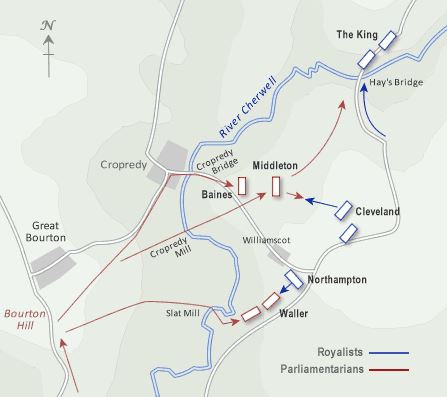
Waller’s army was shadowing the King’s column from the other side of the Cherwell valley and opted to attack the marching force in the fields between Cropredy and Wardington after part of it had already crossed the Cherwell at Hay’s Bridge.
To do this he had to get his men across the river in a hurry, at Cropredy and Slat Mill, seal off the exit at Hay’s Mill – the eliminate the inferior force he had just trapped in the bend of the Cherwell.

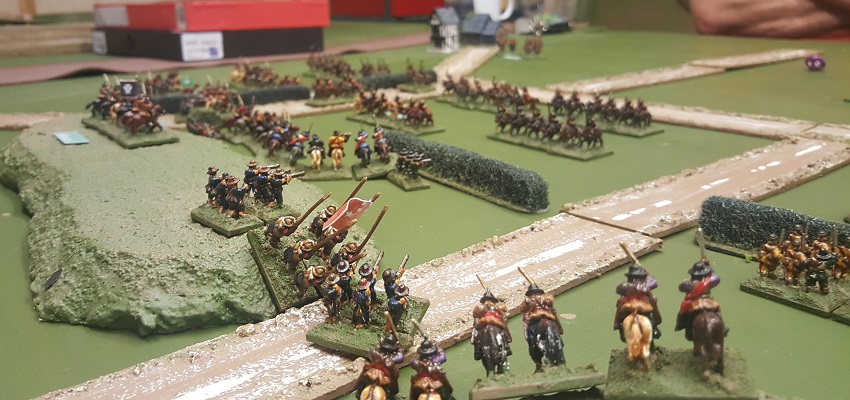
(Cropredy: some fleeing Royalist cavalry escape to safety across Hay’s Bridge)
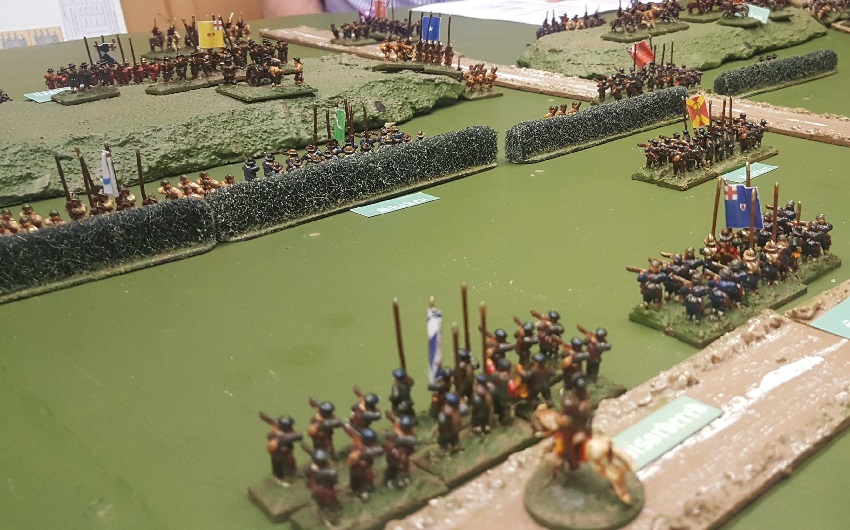
We were still using squares, which created quite a few anomalies during the game … and unit-by-unit activation (which allowed multiple attacks on individual units in a way that really does need to be tidied-up) …
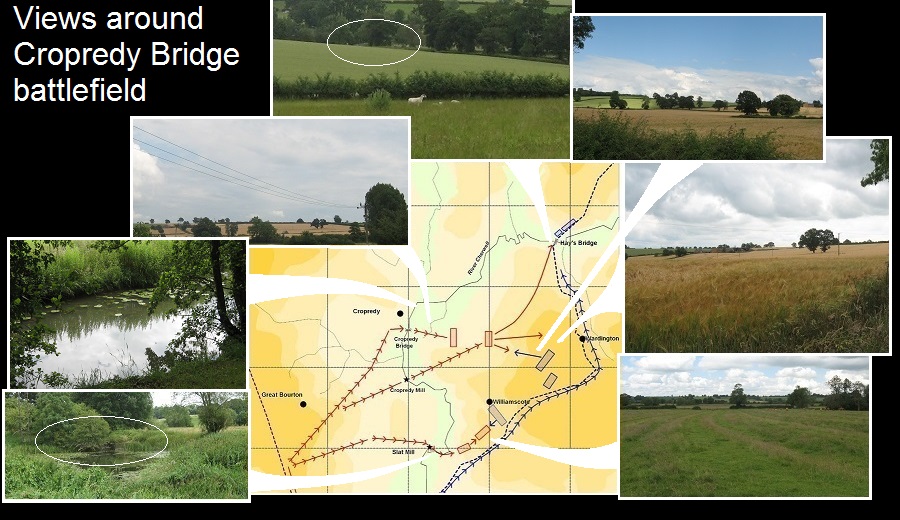
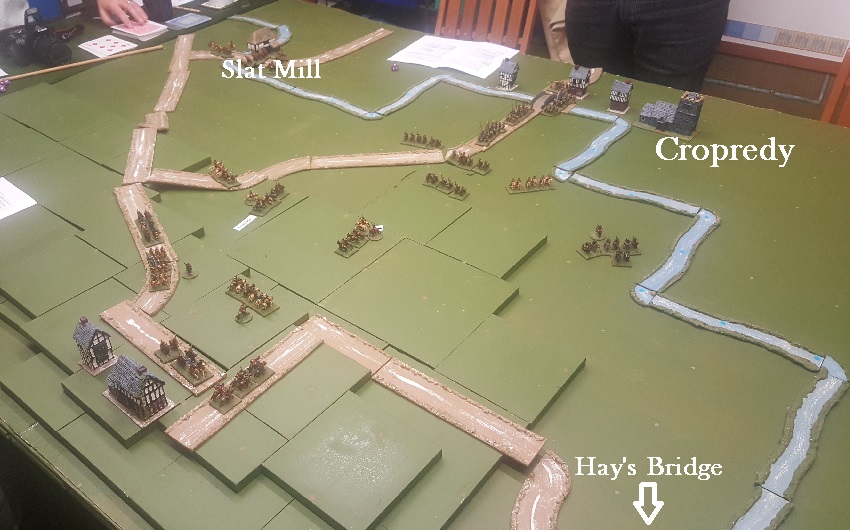
(Cropredy Bridge: some views of the battlefield today)
In this game the initial attacks from the Parliamentarians went very well … Royalist leaders falling off their horses and being taken prisoner … but as the game progressed the management difficulties mounted and the historic withdrawal became inevitable … and probably more awkward in the game than in 1644!
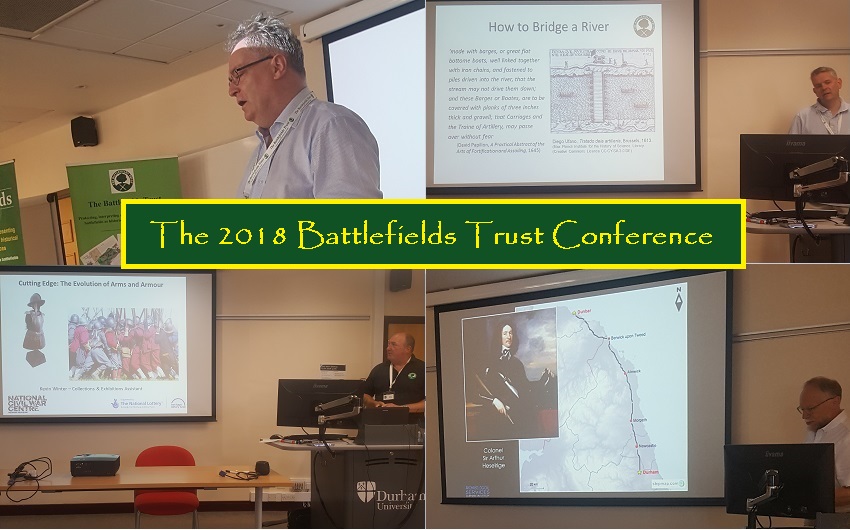
This year’s Battlefields Trust AGM and Conference had a number of interesting sessions for the ECW enthusiast …
Mark Hornsby and Phil Philo explained a lovely model Mark had constructed of the manoeuvres and actions at Piercebridge in 1642 in 6 and 2mm …

Great stuff displayed alongside the very different approach I have used for Naseby.
You will have doubtless seen the Naseby model before but here are some details from Piercebridge …
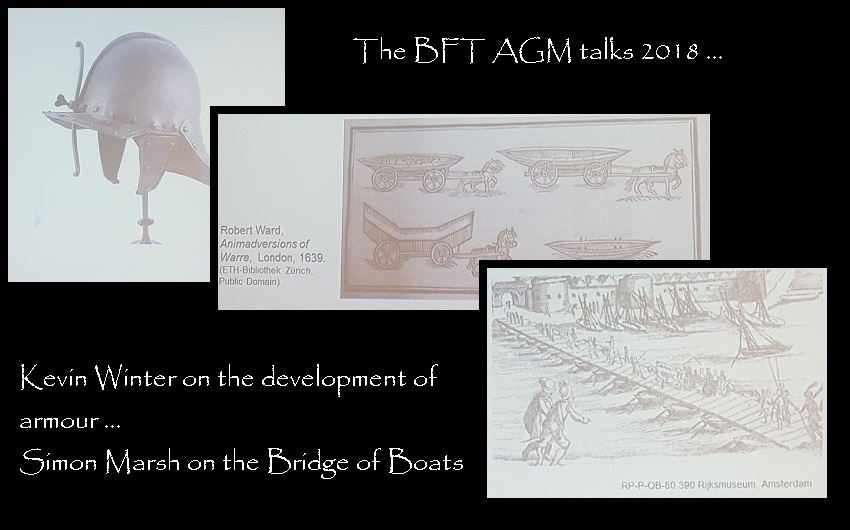
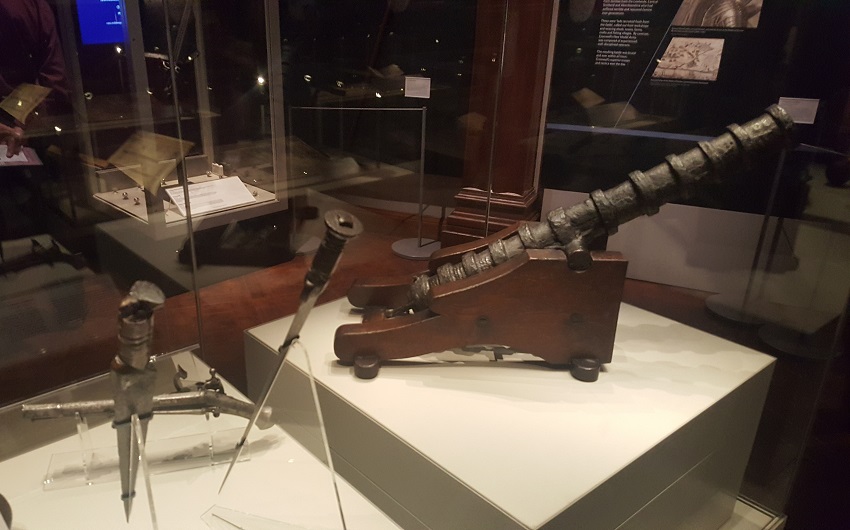
Several of the talks were on our period also … Kevin Winter (NCWC) did a presentation on the development of armour … Simon Marsh presented a summary of the work (and the evidence) on the bridge of boats project …
… but very specific to this conference (in Durham), we had a talk on the Dunbar bodies found adjacent to the cathedral … victims of the death march and (in many case, fatal) incarceration of prisoners from the battle of Dunbar …
Durham University Archaeology Project
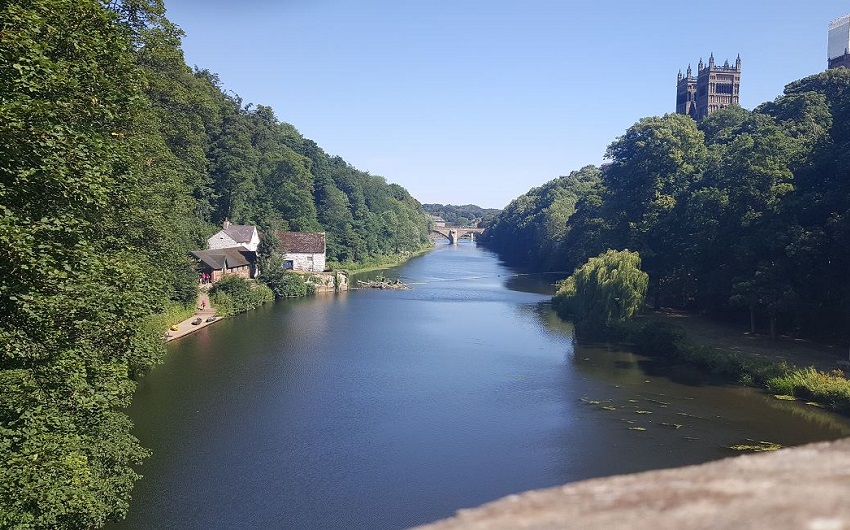
We walked into the city and visited the site and the exhibition …
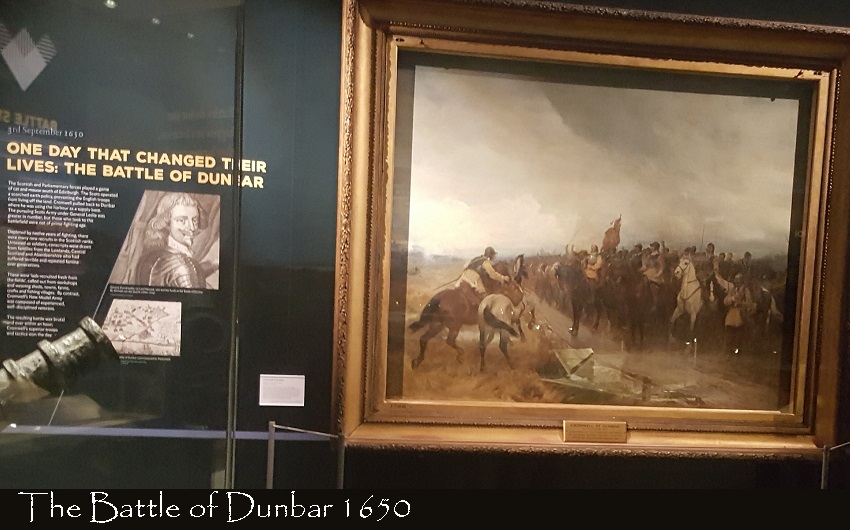
Well worth an hour or so of your time. A fascinating story. Most did not survive the horrifying ordeal. Many of those that did found a new life after transportation and a decade of servitude in New England. A brilliant example of research.
We also visited the reinterment site and paid our respects.

(the Battlefields Trust delegates honour the deceased captives of the 1650 Battle of Dunbar)
Think about joining the Battlefields Trust and look out for the 2019 Conference/AGM.